Showing posts with label Enchanted. Show all posts

Comparison Thursday: Pale Pink Indie Holos

First thing's first.  I'm selling grab bags again!  I've lowered the price to $25, which includes domestic US shipping, PayPal invoice fee, and 7 polishes.  Contents of the grab bag will be 7 polishes consisting of 2 full size drugstore brands, 1 mini (either indie, drugstore, or salon), 2 full size salon brands, and 2 full size indies.  THESE BAGS INCLUDE HTF AND DC INDIES AND EACH BAG WILL HAVE AT LEAST 1 HOLOGRAPHIC!  The DC polishes are ones that came out last year that have been discontinued for a very long time.  Those will be going first, so grab one while you can!  I will be accommodating with color and finishes, but I can't tell you which polishes are available or let you choose the polishes that will go into your bag as that's too time consuming.  Please email me at wishesofablueeyedgirl@gmail.com for inquiries.  Please include your paypal address as well as your favorite/least favorite colors and finishes.  For more information, check out my blog page: http://wishesofablueeyedgirl.blogspot.com/p/blog-sale-or-swap_17.html.

Ok, now that the shameless plug is out of the way, let's get down to the comparisons!  I've chosen Enchanted Polish September 2013, Enchanted Polish J'Adore, and Blue-Eyed Girl Lacquer We Saved the World, I Say We Party! (aka Buffy) from the Once More with Feeling Collection.  Let's take a look at how they compare below.


As you can see from the bottle shot, the colors are quite different.  Buffy is a more greyed out pink that leans lilac.  September is a rose, and J'Adore is a super pale and dainty pink.


The rainbow effect is minimal in J'Adore to almost non-existent.  It's relatively strong in Buffy, but this lighting doesn't showcase it very well.  September, however, is the most brightly rainbowed.  Yes, rainbowed is now a real word...


As for application, Buffy was very easy to work with and only required two coats.  There isn't any dragging or balding like with so many other holographics.  You also don't need to use an aqua base.  September comes in second in terms of application.  It was also a two coater, but it was a bit thick in comparison.  Lastly, J'Adore is just so sheer that it required four coats, which means that it took forever to dry.  The consistency also wasn't all that great as it was also a bit thick.


So, there you have it!  You can purchase Enchanted Polishes at her store as well as several e-tailers.  Follow Chelsea at her Facebook and IG for news and updates on releases.  My polishes are available at my store here.  Follow me on Facebook and IG for news and updates on new polishes, releases, sales, and giveaways!

So, now that I've featured one of my own polishes for Comparison Thursday, is this something that you'd like to see more often?  What polishes would you like to see compared from my line?  Let me know in the comments, and I'll see if I have them!  I don't try to intentionally dupe other polishes, so any such duplication is purely coincidental.  Often times, I'll have worked on something for several months before release, and then once it's released another polish comes out just like it.  Either way, though, I'm always glad to show you comparisons, and that includes comparisons using my own polishes!

Enchanted Polish Tenderheart

Today has been a super busy day of making polishes and working on blog stuff.  I'm super excited to announce that my polish line's November Duo is up in the shop for preorder.  Go and check those out here!  There will be a proper restock of the duo as well as everything else in my store (minus the Nail Polish Frights collections) on 11/18.  If you order your polishes now, though, you can get free shipping on orders $20 and over by using the discount code NOVEMBERFUN.  So, get on over there if you've been looking to try my polishes out!

Tonight, let's take a look at Enchanted Polish Tenderheart worn over OPI Liquid Sand The Impossible.


*I was not financially compensated for this post.  All items in this review were purchased by me for my own use.  The opinions are completely my own based on my experience.  For more information, please see my Disclosure Policy in the tab above.*

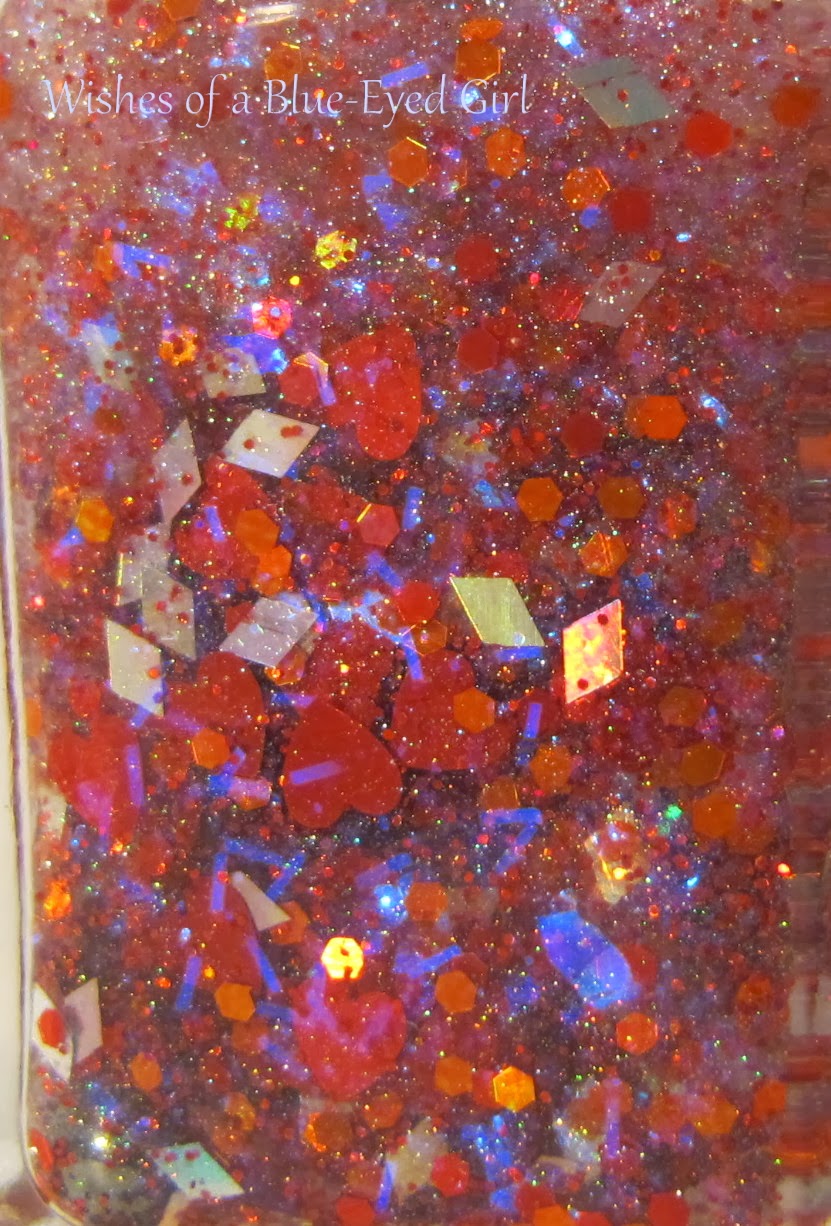
Color: Clear based polish with iridescent shreds, silver holo diamonds, red holo hearts, and various sizes of red hexes.
Finish: Glitter Top Coat – glitter in a clear base to be worn as a top coat.


Bottle / Brush: Rectangle bottle – The wand is the standard length, but the brush is a little too thin to pick up large / shaped glitter without fishing.  The brush's width is also an issue for spreading.  It doesn't fan out and pretty much requires you to dab polishes that are densely packed with glitter.


Opacity: Glitter topcoat – not designed for full opacity.
Glitter Application: Hard – difficult to dig the glitters out of the bottle, spreads well with the dab method, but pools at the cuticles and bubbles when dry.


Consistency: Super thin – runny and floods the cuticles easily.
Overall Ease of Application: Hard – applies with some pooling and bubbling.


Stampability: Not designed for stamping.
Dry Time: Long – dry to the touch with minimal smudging in over 8 minutes.


Overall Thoughts: As much as I wanted to love this polish, it was kind of a pain in the butt to apply.  The base to glitter ratio was way off meaning that there was much more base than there was glitter creating a very sparse look on the nail.  If I wanted to get enough glitter on my nail, I either needed to use several coats or attempt to load up on glitters in one coat, which caused pooling and bubbling.  Stupidly, I went with option two and gobbed one super runny layer onto the nail, which took forever to dry...  Otherwise, I really liked this combination.  The bright pink undies worked really well with the red glitters.  I also like how easily you can see the iridescent shreds, which were my favorite part of the polish.  It was surprising how well it went over the liquid sand texture, but I do wonder if that attributed to the long dry time.  Either way, though, this combo is quite pretty.

Sadly, Tenderheart and the rest of the Love A Lot Glitter collection have been long discontinued.  You can still find them on blog sales and ebay, though, if you're in the market!  Purchase other Enchanted polishes at her store.  Follow Chelsea on Facebook and Instagram for news and updates on new releases.

*I was not financially compensated for this post.  All items in this review were purchased by me for my own use.  The opinions are completely my own based on my experience.  For more information, please see my Disclosure Policy in the tab above.*

Enchanted Polish - Stay Classy San Diego

Summer's almost over, you guys!  Are you ready?!  I'm not.  Probably because I haven't really had a summer...  Womp womp for me...  Tonight's polish is based off of one of my favorite movies of all time - Anchorman!  I'm so beyond excited for sequel.  I'm just really hoping it lives up to the hype.  In the meantime, I'll just settle for staring at the insanely beautiful Enchanted Polish Stay Classy San Diego.


Do you know the origin of the name San Diego?  Well, let Mr. Burgundy enlighten you...


Ahhh, good old Will Ferrell!  Anyway, let's get onto the polish!

*I was not financially compensated for this post.  All items in this review were purchased by me for my own use.  The opinions are completely my own based on my experience.  For more information, please see my Disclosure Policy in the tab above.*


Color: Vibrant red holographic.


Finish: Holographic – pigment gives polish a rainbow in the sunshine.


Bottle / Brush: Rectangle bottle – cap is easier to open than the ribbed version.  The wand is the standard length, but the brush is a little too thin to pick up large / shaped glitter without fishing.  The brush's width is also an issue for spreading.  It doesn't fan out and pretty much requires you to dab polishes that are densely packed with glitter.


Opacity: Medium – achieves opacity at three to four coats.
Glitter Application: N/A 


Consistency: Easy – Spreads evenly without much manipulation.
Overall Ease of Application: Medium – applies easily and doesn’t flood the cuticles.


Stampability: Not tested for stamping.
Dry Time: Medium – dry to the touch with minimal smudging in 3-8 minutes.


Overall Thoughts: There's a reason why people go crazy over Enchanted Polishes.


Application with every Enchanted I've used has been stellar.  Super easy to get onto the nail without the need for much, if any, cleanup.  The holos in her polishes have a strong prismatic effect that's best seen in bright light but is still noticeable in lower indoor lighting.  Plus, I love this color red.  It's the perfect red to me and will be great for football season!

You can purchase Enchanteds at her storeLlaroweHarlow & Co, and Mei Mei's Signatures.  Follow Chelsea on FacebookTwitter, and Instagram for news of new polishes and restocks.

Are you excited about the next Anchorman?

1 Year Blogiversary Prize 3

Tonight's post is going to be picture heavy, again, so I'm just going to get down to business.  All of the polishes in this post were either purchased by me or donated for the giveaway and not for review.  Tonight, I only have three polishes from the prize to show you.  As always, click on the photos to enlarge them.  To enter, go HERE.


Here's the second prize again:

Prize Three
Sponsored by Wishes of a Blue-Eyed Girl, Sharla Sells Avon, Enchanted Polish, Model City Polish, Elixir Polish, Polished 10, and Nail Bed Dreams.

 Avon Starlight, LA Girl 3D 3D Silver, Blue-Eyed Girl Lacquer Birthday Wishes, Enchanted Polish Dragon Spit, Model City Polish Blue Eyed Beauty, Elixir Polish 1 Year Blogiversary, OPI The Grape Lakes, Sinful Polish Mesmerize, and Bath and Body Works Cucumber Melon Shower Gel.

Obligatory bottle shots:


Elixir 1 Year Blogiversary


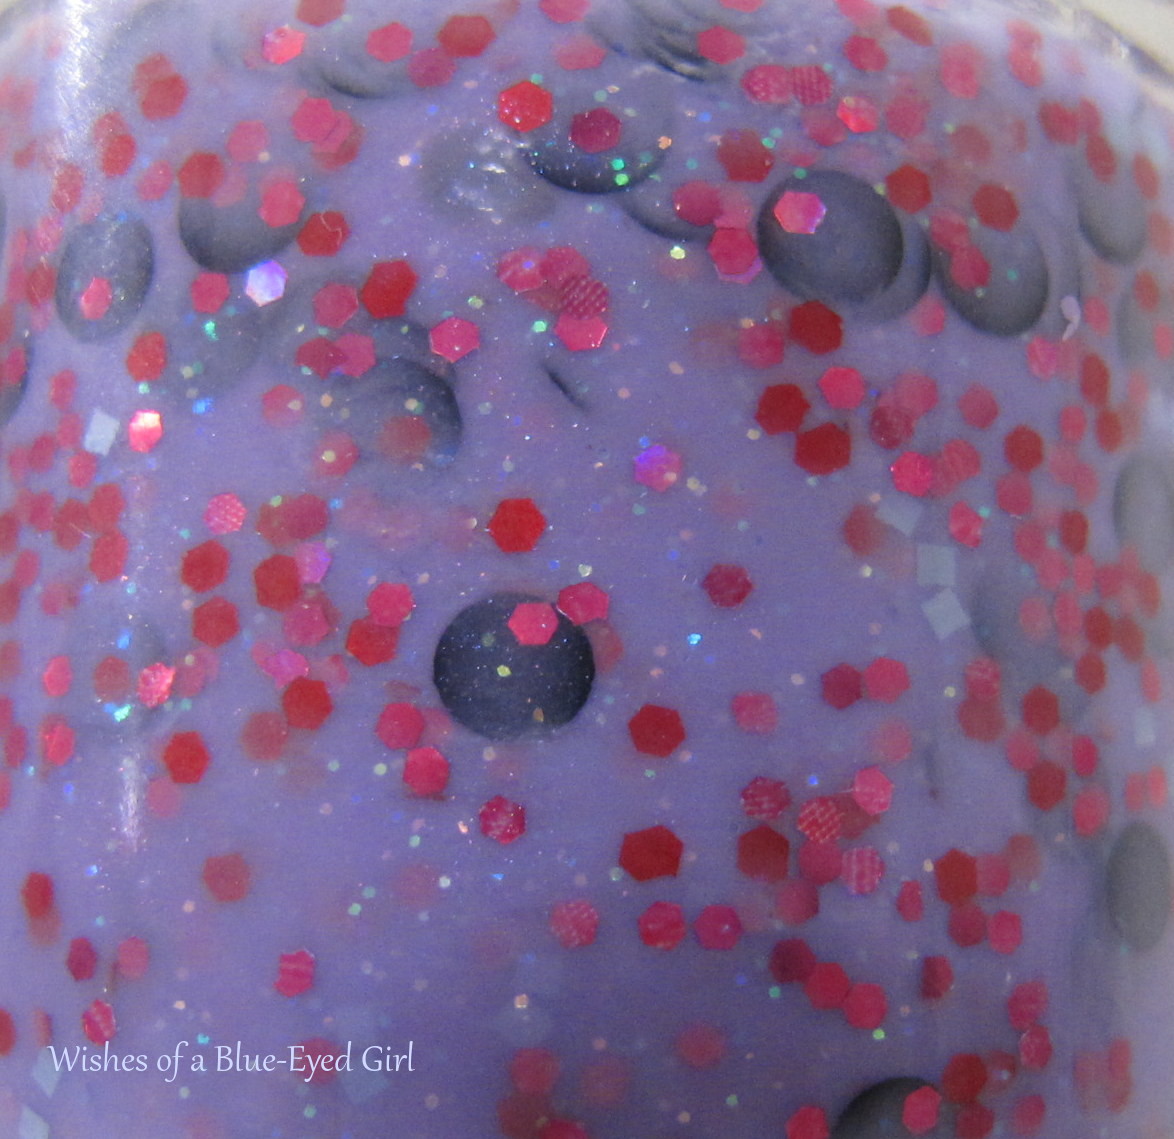
1 Year Blogiversary is a light purple shimmer with red holo hexes, lavender squares, rainbow iridescent micro glitters, and giant black dots.  I adore the iridescent flecks.  They are so unexpected and so pretty.


Application was a little difficult as it was a bit thick for my tastes.  However, I tend to like things on the thinner side, so the consistency of this polish may be perfect for you.  I will also say that I thought I had a polish I could use as undies, but I didn't have a single match!  This is three coats over itself, but I usually like to layer my glitters over undies.  


The glitter spread evenly with a little manipulation.  I can also say that this polish is so unique.  I don't think I've seen anything that comes close!


The dots were easy to dig out, but weren't initially forthcoming on the brush.  I had to actively dig them out, which was pretty simple.  You can purchase Elixir polishes at Nicole's store.  Follow her blogFacebook, Twitter, and Instagram for news and updates on releases.


Model City Polish Blue Eyed Beauty


Blue Eyed Beauty is a dark blue jelly with teal and blue holographic hexes and dots.


I'm not usually a fan of the giant dots, but holy lord, they are amazing in this polish.  Here, I have layered 2 coats of BEB over 1 coat of Cult Nails Time Traveler, a deep navy creme.  The depth and sparkle in this polish is astounding.


Application was super easy.  No pooling, bubbling, streaking, and the glitters came out of the bottle of their own volition fanning out evenly across the nail.  


You can purchase Model City Polishes at her Etsy store.  Follow Nina at her blog, Facebook, and Instagram for news and updates.


Enchanted Polish Dragon Spit


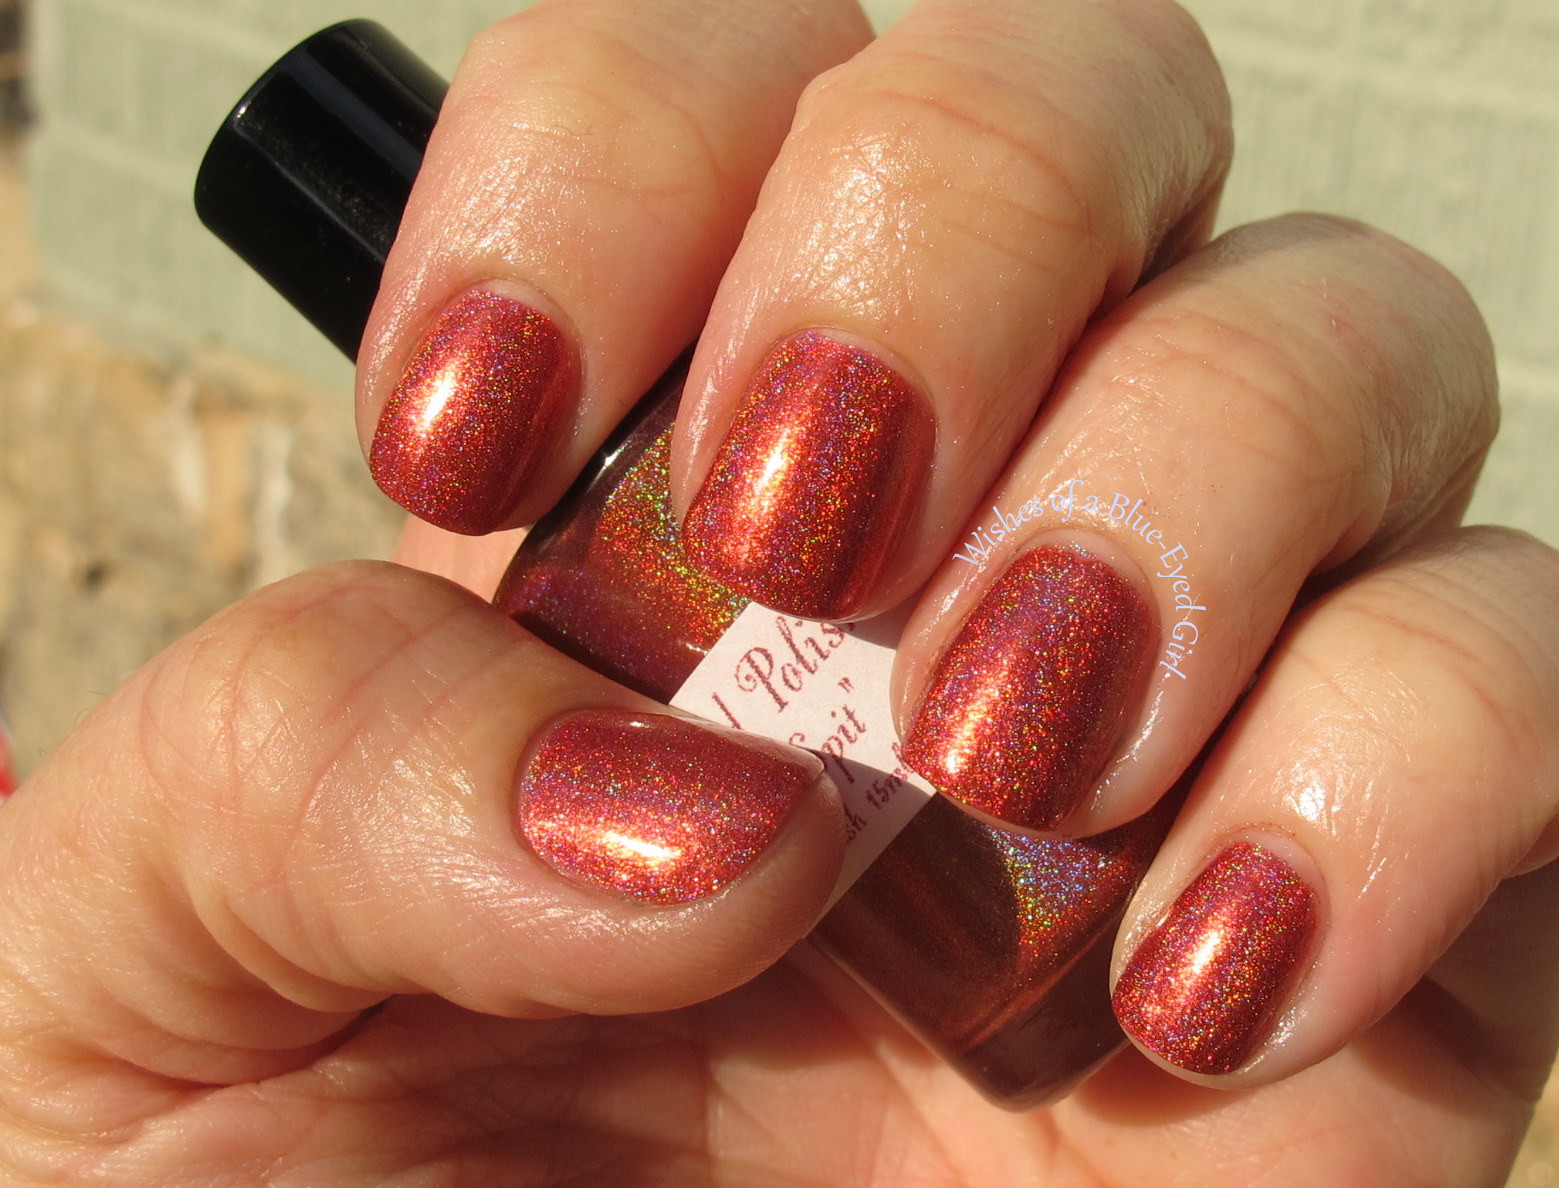
Dragon Spit is a rusty red-orange holographic polish that flashes orange-ish gold in certain lights.  Here it is in indoor lighting.


Dragon Spit has such complex coloring that I may not be describing it right!  I think my photos are pretty accurate, but I can 100% say it's even more gorgeous in person.  Here is Dragon Spit in direct sunlight at sunset.


Unlike a lot of holos, DS had great application, which seems to be the standard MO for Enchanted polishes.  There wasn't any balding, streaking, or dragging.  I didn't need to use my special Aqua Base, either!


Let's just gaze upon this beauty once more...


Ahhhh.  You can purchase Enchanteds at her store, Llarowe, Harlow & Co, and Mei Mei's Signatures.  Follow Chelsea on Facebook, Twitter, and Instagram for news of new polishes and restocks.  Be aware, though, that shopping an Enchanted restock is like shopping the Filenes Running of the Brides.  You'll need to watch for elbows and stampedes.
So, which of the polishes in this prize is your favorite?  I'm loving them all, so I won't choose favorites.  :)

Comparison Thursday Brown Holo Redux Plus a Review

I've received two more brown holos since I posted my brown holo comparison, so I thought it would be a good idea to do a review of one and add a comparison at the bottom!  First, let's take a look at Model City Polish Dipping Chocolate.  Get ready for some serious picture spam!

*I was not financially compensated for this post. I received a sample of Model City Dipping Chocolate for review purposes. All other polishes in this review were purchased by me for my own use.  The opinions are completely my own based on my experience.  For more information, please see my Disclosure Policy in the tab above.* 


I received a sample of Model City Dipping Chocolate for review purposes.


Color: Deep chocolate brown.
Finish: Holographic – pigment gives polish a rainbow in the sunshine.

Blurry shot to show the holo.

Bottle / Brush: Round mini bottle – wand and brush are just long enough to reach the bottom of the bottle.  However, the fact that it’s a mini makes application a little tricky.  Requires a steady hand to apply evenly without pooling.


Opacity: High – opaque at two coats!
Glitter Application: N/A
Consistency: Thick – thick or it can be clumpy, but is easily remedied with some polish thinner.


Overall Ease of Application: Hard – applies with some dragging, streaking, or balding.  Spreads well with manipulation.  Requires quick work to get a smooth result.


Stampability: Not tested for stamping.
Dry Time: Medium – dry to the touch with minimal smudging in 3-8 minutes.


Overall Thoughts: Out of the four true chocolate brown holos I own, Dipping Chocolate is the most holo.  It gives the most bang for your buck.  Application was a bit hard as it dries quickly and requires you to work fast to keep it from balding or dragging.  Otherwise, I loved the fact that it's so pigmented that it only takes two coats while retaining such vibrant holoness.

Now, let's take a look at Dipping Chocolate compared to a few other brown holos.  You can read my first review here.


From thumb to pinkie: Enchanted Polish February 2013, Model City Polish Dipping Chocolate, Kelara Lacquers Chocolate Wasted, Enchanted Polish Hot Chocolate, and Indigo Bananas With a Spoon in It.


The easiest application of the five is Chocolate Wasted.  


The most pigmented is also Chocolate Wasted.  However, the most vibrant is Dipping Chocolate.  It's brown is much richer and deeper than the others.


February 2013 isn't a true brown, but it still flashes brown in some lights, so I thought I'd add it to the lineup.  With a Spoon in It is more like a latte than a chocolate brown, and it has some pretty cool flashes of pink and gold with gold shimmers.

You can purchase Model City Polishes at Nina's Etsy store.  Follow Model City on Facebook and Instagram.  You can purchase Enchanted Polish at her store, Llarowe, and Mei Mei's Signatures.  Follow Chelsea on Facebook, Twitter, and Instagram.  You can purchase Kelara at their store.  Follow Tara and Kellen on Twitter and Facebook.  Lastly, you can purchase Indigo Bananas at her Etsy store.  Follow Andrea on Facebook, Twitter, and IG.

Which is your favorite?

Comparison Thursday: Brown Holos

It feels like forever since the last Comparison Thursday!  Whew, the marathon of insanity is so close to being over that I can taste it!  Tonight we're going to take a look at brown holos!  The goal for tonight's post is to show you a great alternative for two HTF polishes.  That being said, let's get started!  Be prepared for some serious photo spam.

*I was not financially compensated for this post.  All items in this review were purchased by me for my own use.  The opinions are completely my own based on my experience.  For more information, please see my Disclosure Policy in the tab above.*


Enchanted February 2013, Enchanted Hot Chocolate, and Kelara Lacquers Chocolate Wasted


February 2013


Enchanted February 2013 isn't really a dupe of Hot Chocolate or Chocolate Wasted, but I wanted to toss it in since it's a bit close.  It comes off as more maroon than brown with amazing shifts from brown, red, gold, green, pink, and blue all while having a gorgeous holo glow.  Application was fantastic, and this is three easy coats.  Sadly, February 2013 was a limited edition that is no longer available.  You can still find it through re-sellers, though, but it sometimes goes for $30 or more.


Hot Chocolate


Enchanted Hot Chocolate is a very pretty chocolate brown holo.  It's a bit more sheer than I thought it would be, but application was easy.  This is three coats.  Unfortunately, like most Enchanted Polishes, Hot Chocolate is hard to obtain during her crazy restocks.  If you're lucky enough to get one, then congrats!  However, I think that the next polish would be a good alternative should you miss out during the Enchanted restocks.


Chocolate Wasted


Lastly, I have Kelara Lacquers Chocolate Wasted.  Chocolate Wasted is also a chocolate brown linear holo, but it is much more pigmented.  The holo effect is a little weaker than Hot Chocolate, but I think that's because of how pigmented it is.  It applied so easily, and only needed two coats for full opacity.  Chocolate Wasted is stocked steadily at Kelara's store, so if you're looking for an alternative to Enchanted Hot Chocolate, I highly recommend Chocolate Wasted.  Not only is it a dollar cheaper, it is also pretty much the same shade of brown, almost as holo, and more pigmented than Hot Chocolate.  If you don't want to brave an Enchanted restock, Chocolate Wasted is the perfect brown holo for you!


You can purchase Enchanted Polishes at her shop, Llarowe, Harlow & Co, and Mei Mei's Signatures.  Follow Chelsea on Facebook, Twitter, and Instagram for more information on restocks and new collections.  You can purchase Kelara at their store.  Follow Tara and Kellen on Facebook and Twitter for more information on new collections.

Which brown holo do you prefer?