Showing posts with label neon. Show all posts

Blue-Eyed Girl Lacquers: Once More With Feeling Part 2

Wow, so this week has been pretty intense with all of the polish making and working going on!  I'm working towards a pretty huge deadline on Friday at my day job, and I'm also busting my butt to get these polishes made, wrapped up, and shipped out to you guys!  Thank you so much for all of your support.  I am truly humbled and blessed that I have such amazing readers and customers as you!  Tonight's post will feature the last four from the Once More with Feeling Collection, which consists of the vampires and the demons.  Again, get ready for serious picture spam, and remember to click on the pics to see them larger and with more detail.  Also, all photos are taken in either full sun, indirect sun, or under the light of my refrigerator or ice maker.  Lastly, all polishes have between two and three coats without any undies in this post.

The Vamps:
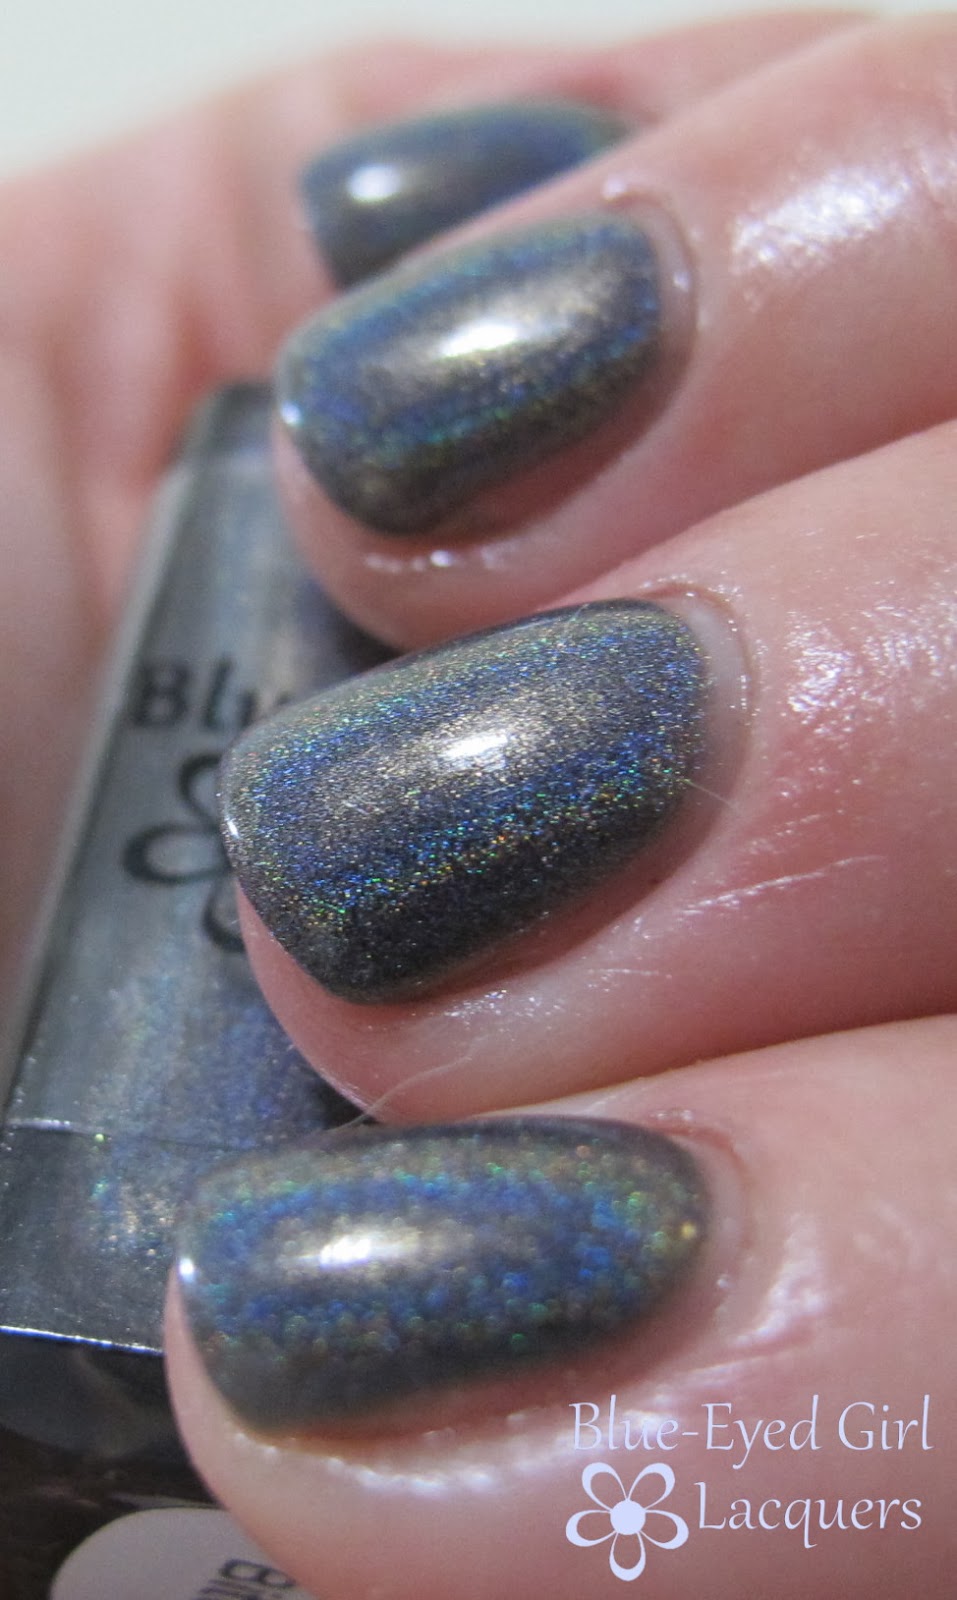
Don’t Worry.  I Don’t Bite: Based off of Angel, the vampire with a soul.  Charcoal linear holo.


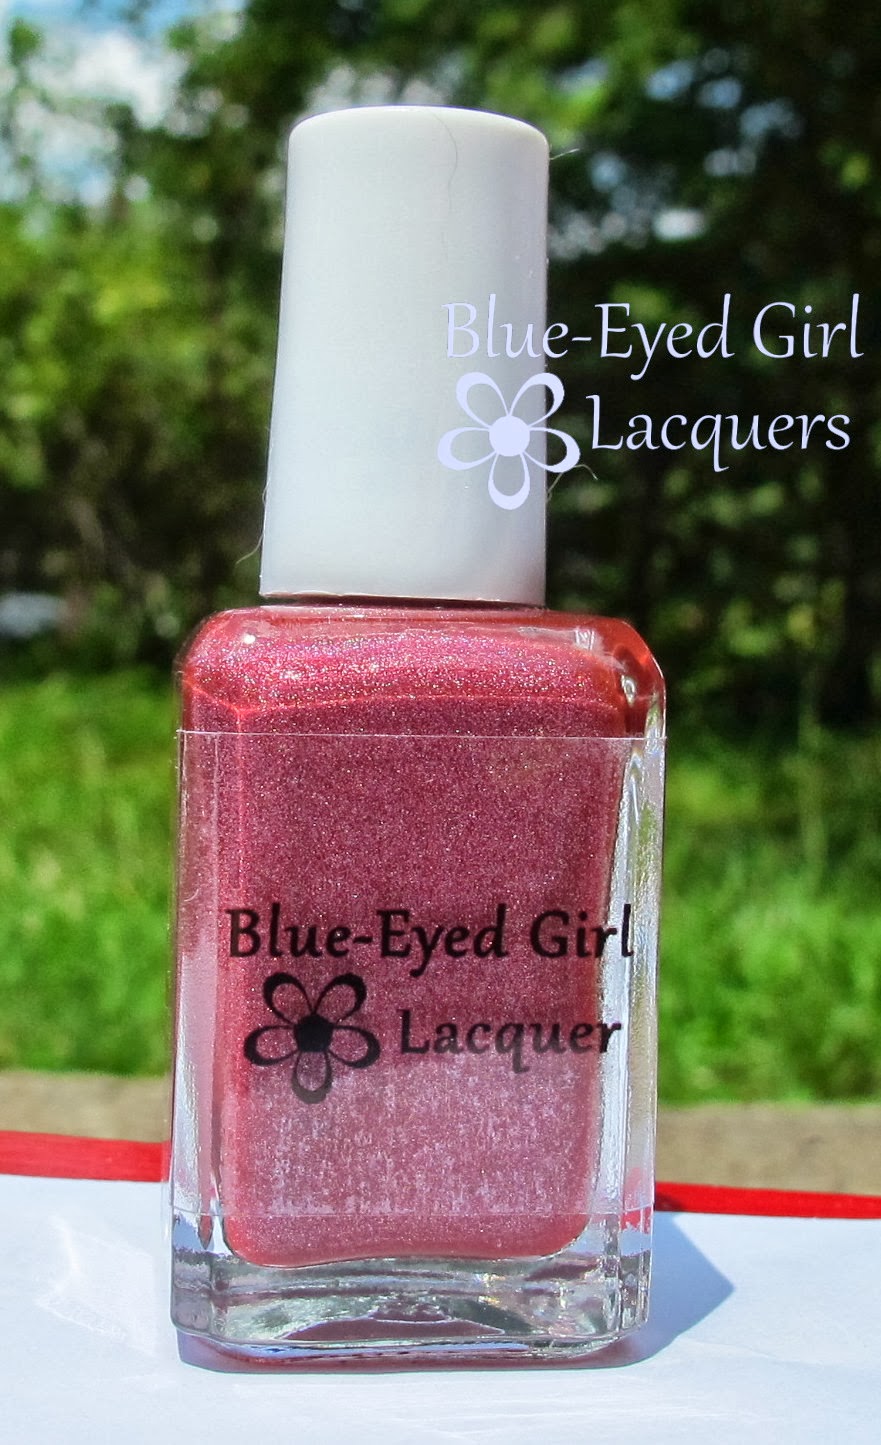
Out. For. A. Walk…  BITCH.: Based off of Spike, aka William the Bloody, the tortured vampire.  Blood red linear holo.


The Demons:
I’m Going Through Some…  Changes: Based off of Oz, the werewolf.  Brown linear holo with copper shimmer.  The copper flecks are much more noticeable in person, but you can see an accurate depiction of them in the second bottle shot.


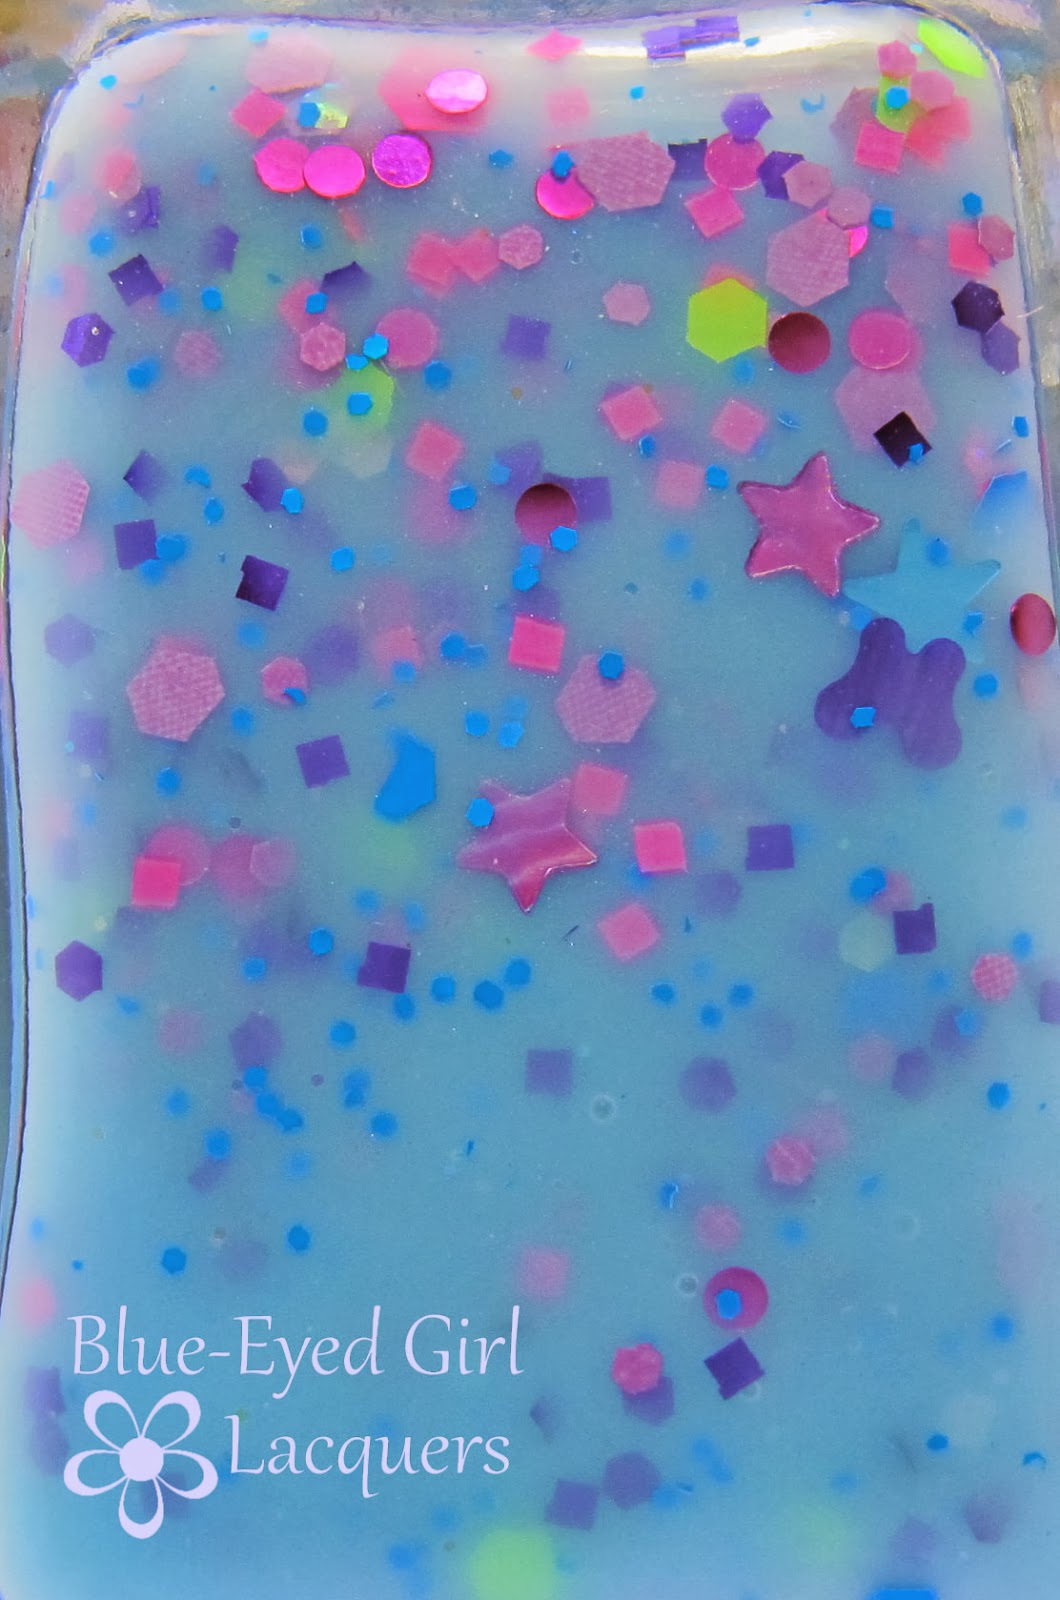
Limited Edition – Floppy.  Hoppy.  BUNNIES!: Based off of my personal favorite character, Anya, the former vengeance demon.  Light blue crelly with multi colored neon hexes and squares, metallic purple hexes and squares, iridescent hexes and squares in varying sizes, blue and purple holo stars, and matte grape butterflies.  This is a numbered limited edition that is available only for those purchasing the full collection OR for those who may happen to win it in a giveaway.


You can purchase Blue-Eyed Girl Lacquers at my Bigcartel store here.  Also, don't forget to follow BEGL on Facebook and IG (which is the same as my normal IG - @blueeyedlawyer).

KBShimmer Dancing Green and Blinded by the Bright

Tonight's post will be a quick one so I can watch the Avengers with the hubby, so I'm going to wrap up my KBShimmer reviews.  I meant to get these done a few weeks ago, but I ran out of time.  Let's take a look at Dancing Green and Blinded by the Bright.

*I was not financially compensated for this post. I received a sample of Dancing Green and Blinded by the Bright for review purposes.  All other polishes in this review were purchased by me for my own use.  The opinions are completely my own based on my experience.  For more information, please see my Disclosure Policy in the tab above.*

Dancing Green


While looking for Mamma Mia Dancing Queen gifs...  I died.


Not sure if there are any other Supernatural fans in the house, but I love me some Dean.  Now that we've gotten a good chuckle, let's take a look at Dancing GREEN, not Dean.


Color: Green jelly with green dots and hexes, fuchsia dots and squares, and dark purple hexes.
Finish: Glitter Jelly – glitter in a colored jelly base.
Bottle / Brush: Mini round 8ml bottle - KBShimmer exclusively uses the mini bottle that has the same proportions as the larger bottle, but just smaller. This means that the cap and wand are a little shorter than the full size bottle, but not nearly as short as the normal mini bottle that's prevalent among indie makers. It's easy to grip and has a decently long wand and thick brush making it easier to grab glitters.


Opacity: Medium – achieves opacity at three to four coats.  Here, however, I've only used one layer over OPI Don't Mess with OPI, a medium green creme.  This gave Dancing Green a bit of a darker hue than if I had worn it alone.  Unfortunately, Don't Mess with OPI stained like crazy.  i still have little dots where the glitter sat on top of the OPI and stained my nails just under the glitter.


Glitter Application: Easy – Spreads evenly without much manipulation.
Consistency: Medium – applies easily and doesn’t flood the cuticles.
Overall Ease of Application: Easy – applies well without pooling, dragging, streaking, or balding.  Spreads evenly and smoothly.
Stampability: Not designed for stamping.


Dry Time: Medium – dry to the touch with minimal smudging in 3-8 minutes.
Overall Thoughts: While greens aren't my favorite, I think Dancing Green would've worked better over lighter undies.  Don't Mess with OPI was a couple shades too dark, which made the whole mani look more springy than summery.  Furthermore, it stained like crazy.  Application was simple and the glitters spread well, so there were no problems there.  Overall, this is a fantastic polish, but even more so if you're a green fan.

Blinded by the Bright


Color: Neon/florescent highlighter yellow with a rainbow of hexes.
Finish: Glitter Jelly – glitter in a colored jelly base.


Bottle / Brush: Mini round 8ml bottle - KBShimmer exclusively uses the mini bottle that has the same proportions as the larger bottle, but just smaller. This means that the cap and wand are a little shorter than the full size bottle, but not nearly as short as the normal mini bottle that's prevalent among indie makers. It's easy to grip and has a decently long wand and thick brush making it easier to grab glitters.


Opacity: Medium – achieves opacity at three coats.
Glitter Application: Easy – Spreads evenly without much manipulation.
Consistency: Medium – applies easily and doesn’t flood the cuticles.


Overall Ease of Application: Easy – applies well without pooling, dragging, streaking, or balding.  Spreads evenly and smoothly.


Stampability: Not designed for stamping.
Dry Time: Medium – dry to the touch with minimal smudging in 3-8 minutes.
Overall Thoughts: Blinded by the Bright is completely accurate.  Holy smokes this polish is insane!  It's so insane that my camera went a little crazy and dulled down the bright about 15 clicks.  In person, though, this shade is legit the same color as a yellow highlighter.  Application was easy, and it lasted me about 3 days with only minimal tip wear from working on my new polish line.  Otherwise, BBtB is a fantastic summer shade.  Or, you know, you can wear it whenever if you don't necessarily care about seasonality when it comes to your polishes.

You can purchase KBShimmers at their online store for US customers and Harlow and Co for international customers.  Follow Christy Rose and the gang on Facebook, Twitter, and Instagram.

*I was not financially compensated for this post. I received a sample of Dancing Green and Blinded by the Bright for review purposes.  All other polishes in this review were purchased by me for my own use.  The opinions are completely my own based on my experience.  For more information, please see my Disclosure Policy in the tab above.*

Ecopolo Summer Mani Challenge: Summer Stamping

Thanks for entering the giveaway, everyone!  Verification of the winners will take some time as there are a lot of entries and options to go through.  Please bear with me as I slog my way through the entries.  I'm hoping to have the winners announced by next Monday at the latest.  In the meantime, I'm going to work on catching up on my Ecopolo Summer Mani Challenge before it's officially over.  Tonight's post is Summer Stamping.


*All polishes and plates used in this post were purchased by me for my own use or were RAOK'd to me by a friend.*

First, I put down Sinful Colors 24/7, a matte hot pink creme that I reviewed here.  I then added accent nails of Lynnderella Flower's Fancy Dresses, a light pink based polish with neons, silver holos, butterflies, hearts, and blossoms.  I thought that it would compliment the neon pink well since it has giant neon pink hexes.


I chose the fruity drinks from Cheeky plate CH36 and the swimsuits and sunglasses from Cheeky plate CH37, which are both art of the Cheeky Summer Collection.  I purchased them on Amazon here.


Before I started stamping, I decided I wanted to test a reader tip on how to get the picture to transfer more cleanly from the stamper to my nail - use a coat of Orly Bonder before stamping.  It seemed to work really well.  The intricate design from the swimsuit plate came off the stamp easily.


I used Konad White and Black, but I'm a little bummed with how the drinks came out.  They smeared when stamping.  I think it was due to the design, though, because the white worked perfectly with the swimsuit design. 


I also smeared the sunglasses with my topcoat, Nubar Diamont.  I waited a sufficiently long amount of time, too, but the black still smeared.  The white, however, played well with Diamont.


You can purchase Sinful Colors at Walgreens and Rite Aid.  You can purchase Lynnderellas at their store here.  Follow their fan-run Facebook, Twitter, and IG pages.  Lastly, you can purchase Konad stampers and polishes here.


Jindie Week: Day 2 - Neons

Day two of Jindie Week brings us two of my favorite neon polishes - Candy Land and Swoon. Get prepared for some major Jindie spam!

*I was not financially compensated for this post.  All items in this review were purchased by me for my own use.  The opinions are completely my own based on my experience.  For more information, please see my Disclosure Policy in the tab above.*

Candy Land


Color: White base with neon pink, blue, green, yellow, orange, and purple hexes in various sizes


Finish: Glitter Crème – glitter in a crème base.
Bottle / Brush: Tall round bottles with round cap - the cap is a little awkward to hold because it’s so round but also pretty short.  If you have a hard time holding caps, this bottle type might be difficult for you.  The wand and brush are long and slender allowing you to grab glitters from deeper within the bottle but making it a little more difficult to get the larger glitter pieces to stay on the brush.


Opacity: Medium – achieves opacity at three to four coats.
Glitter Application: Easy – Spreads evenly without much manipulation. However, it was a little more difficult to get the large glitters out of the bottle. The polish is designed to have sparse glitter on the nail instead of an overbearing glitter bomb. Just make sure to flip it upside down to be able to get to the larger glitters.


Consistency: Thick – thick but is easily remedied with some polish thinner. I should note that it is thicker in order to suspend the larger glitters. Please keep in mind that this particular metric is extremely subjective. One woman's too thick may be another woman's perfect.


Overall Ease of Application: Medium – applies well with minimal pooling, dragging, streaking, or balding.  Spreads well without much manipulation.


Stampability: Not designed for stamping.


Dry Time: Medium – dry to the touch with minimal smudging in 3-8 minutes.


Overall Thoughts: I've said it before, and I'll say it again - Jen from Jindie Nails is a MASTER at the white crelly glitter. While it was a little thick for me, it wasn't unmanageable. In fact, it was pretty darn easy. I just flipped the bottle over for a bit then painted as normal. The glitters were easy to spread, and I really love how they layered over one another. In fact, take a look at my ring finger. Isn't that hot?! There is also a Remix of Candy Land that includes micro glitters. Personally, and this is hard to say, but I like the original Candy Land better than the Remixed version because it's so clean and fresh looking. It's almost like, well, candy! Although, I don't think it would hurt to have them both in your collection... Sorry, that's the hoarder in me talking. I promise!

Swoon


Color: Baby blue based creme with orange, yellow, and blue hexes and teal dots


Finish: Glitter Crème – glitter in a crème base.
Bottle / Brush: Tall round bottles with round cap - the cap is a little awkward to hold because it’s so round but also pretty short.  If you have a hard time holding caps, this bottle type might be difficult for you.  The wand and brush are long and slender allowing you to grab glitters from deeper within the bottle but making it a little more difficult to get the larger glitter pieces to stay on the brush.


Opacity: Medium – achieves opacity at three to four coats.
Glitter Application: Easy – Spreads evenly without much manipulation. Swoon is very similar to Candy Land in that the polish is designed to be sparse, so it takes a little work to get the larger glitters out and to get enough glitters on the nail for a fuller glitter coverage. Again, I recommend flipping the bottle upside down for a few minutes prior to using it.


Consistency: Thick – thick but is easily remedied with some polish thinner. Again, this is thick in order to suspend the giant neon hexes.
Overall Ease of Application: Medium – applies well with minimal pooling, dragging, streaking, or balding.  Spreads well without much manipulation.


Stampability: Not designed for stamping.
Dry Time: Medium – dry to the touch with minimal smudging in 3-8 minutes.


Overall Thoughts: Application is so similar to Candy Land that it's unreal. That's kind of why I wanted to put them together into one post! I'm not a huge fan of orange and blue together normally (ahem go dawgs ahem), but it actually works in this polish because the yellow transforms it from being too University of Florida-like. As you can see, Jen really knows how to do neons and crellies. It's like they're made for each other.

You can purchase Jindies at her store here. You can also purchase Jindies from her stockists Llarowe, Mei Mei's Signatures, Ninja Polish, Harlow & Co, and Femme Fatale. Follow Jen from Jindie on Facebook, Twitter, and Instagram.


*I was not financially compensated for this post.  All items in this review were purchased by me for my own use.  The opinions are completely my own based on my experience.  For more information, please see my Disclosure Policy in the tab above.*