Showing posts with label silver. Show all posts

Guest Post: Nailbed Dreams and the Sparkliest Mani I've Ever Seeeeeen!

Hello, there! I'm Emma from Nailbed Dreams. I'm honored to be here on Julie's awesome blog. I'm here to share with you my newest manicure concoction. I've layered 5 of the sparkliest polishes I own, and came out with an awesome mani! Let me share my recipe with you. 


Polishes used:
Zoya Trixie - 1 coat
China Glaze Glistening Snow - 1 coat
OPI Save Me - 1 coat
OPI Which is Witch - 2 coats
JENsations Holo Daze - 1 coat

I highly recommend you going through your stash and layering your sparkliest polishes! I think next I'm going to try doing this with all blue glitters, purple glitters, etc. What do you think? I absolutely loved the way this came out, even though it about blinds you in the sun! The only downside to this will be trying to get it off, but the good ole foil trick should do the job just fine!

Below, in the top left corner is OPI Save Me. Underneath that is JENsations Holo Daze, followed by China Glaze Glistening Snow. In the top right is Zoya Trixie, followed by OPI Which is Witch?. 


I really hope everyone enjoyed my holo layering! Big thanks to Julie for letting me be here today!

Thanks for reading, 
Emma

_________________________________________________________________________________

Holy wow, Emma!  Thanks so much for sharing this gorgeous mani with us!  This is, indeed, the sparkliest mani I think I've ever seen.  All she needed was a little Lynn Shapeshifter in there and she would've been way over the top!  If you aren't yet, you should definitely be following Emma over at Nailbed Dreams!

BOHEM Nail Jewelry - The REAL Party Nail

I'm always on the lookout for something new, something interesting as it relates to nails. Let me tell you...these are it!

I'm reviewing BOHEM nail jewelry tonight, and if you follow me on Instagram, then you're great. And you also saw a sneak peek of these fantastic pieces of solid silver. Check it out!


BOHEM nail jewelry pieces are certifiably crafted from gold, silver, or platinum. They're the real deal, stamped by the Birmingham Assay Office. Because of this, you'll pay the price (my set is £38 which translates into roughly $60). I honestly love these though, so I'm recommending you grab a set. I'm a thrifty lady, but I can honestly not say anything bad about these.

EDIT 8/22/13: A reader was worried about the sizing of these pieces, and one of the most beautiful thing about this product is their sizing guide, which I used to determine which size nail jewelry to order. Using the instructions on their site to ensure you print the right format and size, you can easily print out their sizing template, cut out the sizes they have, and then place them on your nails to ensure you order the correct size. This is downright brilliant!

All day I wore them around, washing my hands, typing, pulling my fingers through my hair, writing, and even performing a mani from start to finish in nail tech school. They encountered soap, water, oil, lotion, acetone, and alcohol (the rubbing kind). They held on tight.


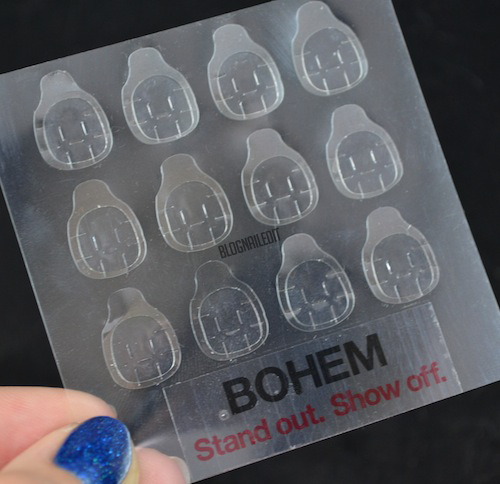
Each piece is adhered to your nail via a piece of glue tab that comes with the set. Each set comes with 24 tabs, which is enough for 12 wears. Replacement tabs are available for purchase as well, so if you run low, you can order more. 

To apply them, first adhere the tabs to the back of the jewelry. Real press it down to ensure it doesn't pop off unexpectedly. I used a pencil to roll the glue tab into all available surface area. Then, after dehydrating and buffing your nail, press the piece onto your nail. Hold it there for three minutes to ensure a good seal. When you're done, make sure not to pull on the piece or get water on that finger.

The piece has a wear-time estimate of 24 hours. I am happy to report that number is true, and like I said, that was with normal wear. I may have coddled my middle finger a little more today than usual, but it took an average amount of wear and tear. I also kept tapping it on anything glass or ceramic to listen to the fantastic noise it made.

I wear ridiculous patterns on my nails all the time, but these got more attention than anything I've done in a while. People were shocked to hear it was real silver on my fingernail.

Another pro of these is that you don't need to purchase anything extra. Just buff your natural nail with the included buffer, use the glue tabs, and voila!

The design choices are all really interesting too, and span across a wide variety of styles to choose from. My design is called Lace. Here are a few of my other favorites:

Are you as smitten as I am? Would you pay that much for these? I'm happy to answer any additional questions you have. Get your own set at the BOHEM nail jewelry store online.


These products were sent to me by BOHEM. The reviews are based entirely on my experience with the products and were in no way influenced by anyone.

A glitter gradient!

Wow, I've got a lot of things I'm working on that will, hopefully, translate into awesome things for you guys!  I cannot wait to spill the beans, but I must figure out all the details first.  Hehehe, I'm not gunna lie, I'm liking these teasers, y'all.  Hah!  Anyway, tonight, I'm going to show you guys a glitter gradient I did earlier this year over my Comparison Thursday Starry Starry Night comparison with Cosmos.  Love her or hate her, it doesn't matter to me because I like to stay out of the politics, but I do love this polish - Lynnderella When the Moon was a Star.


*I was not financially compensated for this post.  All items in this review were purchased by me for my own use.  The opinions are completely my own based on my experience.  For more information, please see my Disclosure Policy in the tab above.*


Color: Clear base with blue and holo blue hexes and holo silver stars and moons.
Finish: Glitter Top Coat – glitter in a clear base to be worn as a top coat.


Bottle / Brush: Rectangle bottle – ribbed cap that is a little hard on the hands to open if you have sensitive skin.  The wand is the standard length, but the brush is a little too thin to pick up large / shaped glitter without fishing.  The brush's width is also an issue for spreading.  It doesn't fan out and pretty much requires you to dab polishes that are densely packed with glitter.
Opacity: Glitter topcoat – not designed for full opacity.  Although, WtMwaS is sooooo densely packed with glitter, that you could probably do a crazy glitter overload with a couple layers.  Remember to either use the foil method or a glue base if you go that route to help with removal.


Glitter Application: Medium – requires the dab method, but spreads evenly.  Here, I used the dab method with the brush on my tips instead of using a sponge like I normally do for gradients.
Consistency: Thick – thick or it can be clumpy, but is easily remedied with some polish thinner.
Overall Ease of Application: Medium – applies well with minimal dragging or balding.  Spreads well with the dab method.


Stampability: Not designed for stamping.
Dry Time: Medium – dry to the touch with minimal smudging in 3-8 minutes.


Overall Thoughts: I think this glitter topper was a perfect mate to my Galaxy Nails in a Bottle duo.  It helped finish the galaxy look with the added stars and moons.  They were easy to get out of the bottle, but I do recommend flipping it upside down before using it for a few minutes to make sure you get as many as you want.  I haven't worn this polish over my whole nail yet, but that's something I plan to do soon.  As for now, it worked great with this gradient.  Removal was a pain, as per usual with glitter bombs, but I used my trusty felt pad soaked in acetone trick, and it came off decently easy.  Ain't nobody got time for the foil method.


You can purchase Lynnderella polishes from their store here.  Follow the fan run Love Lynnderella Facebook, Twitter, and Instagram for news, updates, and giveaways!

What's your favorite galaxy in a bottle polish?

*I was not financially compensated for this post.  All items in this review were purchased by me for my own use.  The opinions are completely my own based on my experience.  For more information, please see my Disclosure Policy in the tab above.*

Model City Baby It's Cold Outside!

Ok, tonight's post is going to be hella packed with pictures and information, so get your reading glasses on and a good glass of something tasty.  It's going to be a long night!


*I was not financially compensated for this post. I received a sample of Model City Polish Baby It's Cold Outside for review purposes.  All other polishes in this review were purchased by me for my own use.  The opinions are completely my own based on my experience.  For more information, please see my Disclosure Policy in the tab above.*

As always, when I receive a polish for review, I just have to ask the maker a few questions so that you, reader, and I can get to know our favorite makers a little better.  Here are a couple of Nina's answers 
to my silly questions, along with some interspersed photos of Baby It's Cold Outside.


1) Are all of the polishes you've created in one collection?  If not, what are your collection names?


I have tons of one offs and currently 2 collections. One collection is my Spring Collection which consists of 5 pastel colors with a hint of fine holographic glitter. The other is my Ramones Inspired Collection. Ramones was an amazing bands that helped produce a wonderful music scene and was inspiration to so many, this set was my thank you.

I was not financially compensated for this post. I received a sample of Model City Polish Baby It's Cold Outside for review purposes.

2) Of the polishes you've sent me, what collection(s) do they belong to?

All that I sent you are one offs (Baby, It's Cold Outside was part of my Christmas Collection that is no longer offered).


3) What was your inspiration for the polishes you've chosen?

Dipping Chocolate was a request by a co worker. She suggested I make a chocolate colored polish with glitter. I immediately knew what I had to do, a chocolate holo. I have been selling this one since Dec and it has been a great seller.

Baby, It's Cold Outside was originally created for my holiday line up but I just loved it too much to retire it afterwards. This polish gives a chilly but soothing feel just by looking at it. That's why I decided to name it after one of my favorite wintry songs.


4) What was your inspiration for your brand name?

I live in Anniston, AL and our town motto is The Model City. My town was completely planned out and organized before the first road was ever laid. Due to the extreme planning and organization it seemed appropriate to use as my company name. All of my polish is carefully planned, tested, and bottled for perfection. Then with my extreme organization I have everything ready to go so my turn around time of shipping is 1 day, even with big release days.

Ok, let's get down to business!  Because I'm wicked lazy tonight, and we have a lot of material to get through, I'm going to shorten the name to just Baby.  I tried Baby over 3 different undies, OPI Glacier Bay Blues, Illamasqua Baptiste, and Color Club Blue Heaven, so photos of each combo will be interspersed throughout the post.  As always, click on the pictures to make them bigger.


Color: Clear base with baby blue and silver holo hexes in various sizes.


Finish: Glitter Top Coat – glitter in a clear base to be worn as a top coat.


Bottle / Brush: Round mini bottle – wand and brush are just long enough to reach the bottom of the bottle.  Normally, the fact that it’s a mini makes application a little tricky, but Baby is such a smooth polish that I was able to do gradients and full nail coverage without any problems at all.  The mini brush was actually kind of helpful this time around.


Opacity: Glitter topcoat – not designed for full opacity.


Glitter Application: Easy – Spreads evenly without much manipulation.  For the gradients, I used the dab method, but it spread easily and I didn't have to dig to get the glitter out.  


Consistency: Medium – applies easily and doesn’t flood the cuticles.  


Overall Ease of Application: Easy – applies well without pooling, dragging, streaking, or balding.  Spreads evenly and smoothly.


Stampability: Not designed for stamping.


Dry Time: Medium – dry to the touch with minimal smudging in 3-8 minutes.


Overall Thoughts:  Holy crap you guys.  I'm not normally a fan of glitter toppers, but Baby is one of the most versatile and easy to use toppers I've ever had the pleasure of owning.  As I've said above, application is super easy, and the effects you can make are stunning.  I wish I had tried a jelly sandwich, but I didn't have the time.  I'll probably do one soon and post it on my Facebook or Instagram pages, so keep an eye out there for another way to wear Baby.  I chose to do a gradient, a ruffian gradient, and full coverage to really showcase this polish.  It looks fantastic over dark and light colors, making it extremely versatile.  The pale color evokes wintry coolness, just as Nina intended.  I have a feeling I'm going to get a lot of use out of this beauty!

You can purchase Model City Polishes at her Etsy store.  Also, follow Nina on Facebook and Instagram for news and updates on new collections.

What's your favorite glitter topper?

I was not financially compensated for this post. I received a sample of Model City Polish Baby It's Cold Outside for review purposes.

Runway Stamp


After I stamped these nails, I realized how well the pattern would have gone with the Tadashi Shoji nail art competition. I'm still really glad I did my design freehand though, but this would have been a fantastic stamp alternative.

You can still vote for my entry here! I'd love your support!

With the winter weather whipping the windows and calling all chills, my nails have been both dry, brittle, and uninspired. Luckily I recently received my plates from Cheeky. If you've been thinking of getting some plates, get these! You can get three jumbo plates, including plate C, which I used in this design, for $19.99 here. Apparently there's also a steal of a deal on a 6-jumbo-plate set for $39.99. Uh...what?! That's unheard of! And these plates honestly rock. The designs are HUGE, and the only thing you'll be complaining about is the fact that your stamper is probably too small for them. Seriously...dang.

Don't you love the blue I used? It's Essie's Aruba Blue. The stamp is Silver Sweep (Sally Hansen Insta-Dri).

Heavenly Crown


Tonight's manicure is a simple little gradient. I used Heavenly (Savina) and Crown Me Already! (OPI). If you want to get this same effect, check out my tutorial here.

Though it's simple, it's in preparation for a class reunion. Which class? Miss's Sation Limited II Collection, Class of Sation. Adorable photo, with some adorable polishes accompanying it. Stay tuned, swatches of the classmates will be up in the next day or two!

CLICK TO ENLARGE

Glitter and Nail Art: Day 6

Dummy! Who does a holographic nail art design but doesn't take pictures until it's too dark!?


Sorry Mercury Twilight, I didn't do you any justice in these shots.

In lieu of the amazing shots of this polish I'm sure I'll be able to grab and update with tomorrow, here is a sunny picture of my last manicure with my favorite flower, the pansy.


I apologize for the small post, but I'm heading out the door and I don't have much time after the hike that brought that pretty flower out.

You'll notice there isn't much to the nail art today. Well, again, not much time. The polish I used is another F4 Polish polish called Stormy Night. I should've worn it two nights ago, when it really was stormy.

I'll get better pictures of the holographic and glitter mix tomorrow when (and if) there's sun. Have an awesome night!

Edit: Here is an updated sun picture. THERE'S THAT HOLOGRAPHIC!

Hard Rocks


I scored School of Hard Rocks at Walgreen's for $3. I'll admit, I was totally shocked to see it there. It's easily one of the most gorgeous green shades I own. I've been wanting to put it on my nails for a few weeks. It's so creamy and dark. I took a lot of care putting it on because I wanted to keep looking at it. God it's lovely.

I didn't know it was called School of Hard Rocks until I looked into my Helmer and saw it sitting there, with its name all up on top in the color of the polish (one of the smartest decisions any nail polish company has ever made). When I saw that, I wanted to add some 'rock' to it, so I went with neon shades made of Flip Flop Fantasy and Icicle (China Glaze), then outlined with Black Creme (Wet n' Wild).