Showing posts with label Polish. Show all posts

Review: Anne Kathleen Nail Polish

Hello!

Today I have a new-to-me cruelty-free, big-5 free indie brand to show you, Anne Kathleen.

Anne Kathleen currently has three nail polish collections up on her site, with an impressive range of polish types. Leanne, the owner, sent me two polishes from the yummy Cafe Au Lait collection to try out; anything involving coffee is the fastest way to my heart...sigh...


First up is Cinnamon, a polish that I think is perfect for the holiday season; it has a beautiful creamy off-white jelly with copper glitter and gold flakes:


This polish looks like gilt-flecked angel wings to me; it also looks like a golden snowstorm. :) It has a dreamy, sparkly holiday feel without being too in-your-face or over-the-top. This is three coats, and while I do have a little bit of visible nail line in these pictures, keep in mind that my nails have a bit of staining (aka: nail blogger's pox!), so three coats will probably suffice for you. This is thin enough to use as a layering polish, as well, and I think it would be a beautiful topper over a gold or a green base.


The second polish is Ginger, a soft butterscotchy-orangy-peach jelly:


This is three coats of Ginger; she is soft, and has that squishy translucence the way a good jelly should. It suffuses light so beautifully, it was nearly impossible for me to take a bad picture of it (and I don't get to say that very often, lol!) At one coat, Ginger gave my nails a pretty nude tint that made me look like I had naturally beautiful nails. As you can see, I managed to get a little ink staining on my middle nail that I couldn't get off, and it did show through at three coats--but even this highly unusual stain was covered at four coats of the polish (see below). So, again, three coats should be fine for normal people, although you may want to go with four.

Jellies like this instantly make me think of layering, so I wanted to stick in a layer of glitter before putting on that fourth coat. I wanted to see how this would look with Wicked Polish Hung Over The Rainbow, which is a neon glitter mix in a clear base:


Anne Kathleen Ginger layered with Wicked Polish Hung Over The Rainbow

Anne Kathleen Ginger layered with Wicked Polish Hung Over The Rainbow

I love the effect of this, it keeps the fun of the neon glitter but gives it a different twist, and that's exactly what you want a jelly sandwich to do--keep the beauty of the glitter, but change it in a pretty way. And notice that at 4 coats, even my problem nails are perfectly covered. :)

Both of these polishes appeared a bit thick when I first pulled out the brush to put them on, but they didn't apply that way at all. The application was wonderful--effortless, and even. The importance of that can't be overstated with jellies, especially soft jellies like Ginger. These are masterfully made.

Anne Kathleen polishes sell for $10, are big-5 free, and are cruelty-free. Most of them are also vegan (she uses symbols on the site to let you know which are/aren't, and I really appreciate that she does this!). You can find her in the following places:

Anne Kathleen store website
Facebook Page
Twitter
Instagram
Pinterest

Go and check her out! You won't be sorry. :)

Hope your Monday is as stress-free as possible! Hugs and loves,
M.

Before & After: Decorations

(Nothing to disclose)

Hello!

I'm back again just under the wire actually on time (sort of) with today's challenge theme! Today it's the 12 Days challenge, and the theme is 'Decorations'. :)

I started with Julep Mia, a metallic flecked polish that's a tricky shade of silver-green-gold:

Julep Mia

Julep Mia

Julep Mia


Then I stamped over it using Bundle Monster H03. I put both red (Pure Ice Siren) and green (Zoya Hunter) on the image before scraping. Finally, I added some teeny microbeads for accents:


I just realized I put up two three-nail-design manicures in a row! Shows you I'm really into the look right now. Anyway, I like this look because it's soft and elegant; very ladylike and understated. :)

Hope you're having an excellent week,
M.

Before & After: Inspired by my phone backdrop

Hello!

So I've decided to just admit that this month has already managed to get away from me, and jump forward to the next '12 Days' challenge so I can at least give the illusion of being on top of something.

On my phone, I have an app on my phone that shows trees in a wintery scene as my background, and a couple of the trees are decorated with little Christmas lights on them. Santa and his reindeer fly by occasionally, and that becomes more frequent as Christmas gets closer. Since I don't get snow where I live, this is my way of having that snowscape in my life, and I decided to do a manicure to honor that.

I promised you that today I would be doing a review of the half-bead microbeads I showed you yesterday, that Born Pretty Store sent me for review. These are a 100% improvement over the full-sphere ones, because they are only half of a sphere each:

Born Pretty Store half microbeads

This makes them a lot easier to work with, because they don't roll around everywhere if you dump a few of them out of the container; they also are easier to apply and don't stick up as much as regular microbeads. And while I've never had too much trouble keeping microbeads on because I tend to cover well with topcoat, the increased contact area with you nail keeps these on longer than normal microbeads.

For my manicure, I started with the same polish as yesterday, China Glaze There's Snow One Like You; I was very pleasantly surprised after yesterday's post to find out there are a number of you out there that like this besides me! :)


China Glaze There's Snow One Like You

China Glaze There's Snow One Like You


 Then I free-handed some simple trees on three of the nails with Glittering Garland, a dark pine green jelly with gold shimmery bits; I drew an outline of the trees with a small art brush and then filled in with the polish brush itself. I finished by decorating my tree with the half-beads:


You can see how the flat side of the beads changes the look and the dimension over full-sphere beads; sometimes you might want the other look, and it's always good to have choices! :)

I've been really into having nail art on three of the nails lately...I like the negative space that the plain nail gives, and I think it looks cool when the fingers aren't placed right together: 


What do you think? I'm definitely a symmetry girl, but the symmetry issue is solved because the two hands together make it all look symmetrical, even if each hand isn't, lol. Yes, I have more...let's call them quirks...running around in my head than you can even imagine, and a need for symmetry is one of them!

As always, you can use my code for 10% off your entire purchase at Born Pretty Store; I am not an affiliate, but when I checked yesterday, I had enough purchases with a code that Born Pretty Store will be sponsoring a giveaway, so stay tuned for that as soon as I hear back from them!!!


Hope this manicure helps to keep your spirits bright. :)
M.

Before & After: Winter Wonderland

Hello!

If orange is the new black, can 'one day late' be the new 'on-time' for nail art challenges?? Pretty please?

No, I really do just need to get my act together.


Well, today's yesterday's challenge theme for my Crumpet's Nail Tarts Christmas Winter Challenge is 'Winter Nature (Landscapes, trees, frost..)', so today I created for you my version of a Winter Wonderland.


I started with this most controversial of 2013 Holiday Polishes, China Glaze There's Snow One Like You. This is a white, glittered, textured conglomeration of a polish that takes the idea of texture to a new apex or nadir, depending on your personal preference. I admit, I am one of the few who truly love it--it looks to me like drifts of snow and makes me feel like my fingertips have that tree flocking stuff on them. I personally think it looks best with a generous coat of topcoat over the top, to smooth it out a bit:

China Glaze There's Snow One Like You

China Glaze There's Snow One Like You

China Glaze There's Snow One Like You

Next, I stamped over it using Barry M Silver Foil and Bundle Monster 407:


Finally, I put little half-beads as accents for the circles on the design; these were sent to me for review from Born Pretty Store, and I will be doing a more complete review of them tomorrow. If you're interested in buying them in the meantime, I have a 10% coupon code (MCL91):


Later on, we'll conspire


As we dream by the fire
To face unafraid, the plans that we've made


Walking in a winter wonderland. :)

I wasn't sure how this would come out stamped over texture, but I do sort of like the way it makes the light shine off of different parts of the trees, almost like it's being lit by moonlight or something. And what do you think, better with the beads, or without? I think the beads add a little special something.


Hope you're enjoying your winter wonderland, whatever it might be looking like. :)

Hugs and loves,
M.


Before & After: What happens when Rudolf drinks too much...

Hello!!

So I'm part two holiday challenges this month, and I'm already behind on two of them. But it's for a good reason--I'm made some really good progress on my book and should have a complete first draft in a week or two. Woo hoo!

Today's theme, which is for The Twelve Days Of Christmas Nail Art Challenge, is festive colors/glitter.


I started with Jessica Touch it, a gold-silver blend textured polish with glitter for extra glimmer:

Jessica Touch It 


Next I added a layer of Shirley Ann Nail Lacquer Rudolph Ralphed, which I just got in her Black Friday sale; it's a mix of gold, red and green glitters in hex and square shapes. Inspired by the name, I decided to add the little Rudolph who had just ralphed it all over my fingers--I figure, he must have been drinking too much at the annual North Pole Christmas party:


I stamped the reindeer with Konad Black, and China Glaze Passion and Brownstone (I layered them to get the shadaowed effect), and Bundle Monster plate H01. I added a red stud for the nose and two black rhinestones for the eyes.

Look at that little dickens! Cute as a button! Well, at least he looks a little bit sheepish about getting glitter everywhere...sigh...;)

Hugs and love, and don't forget to check out the other manis below! :)

M.

Review: Jamberry Matte Topcoat

Hello!

I have been on a continuing quest for a matte topcoat that comes even close to China Glaze's Matte Magic, since the only form of this I've been able to find is the teeny little bottles, for not so teeny little prices. The only ones I've seen that seem to do as good of a job are from brands that are not cruelty-free, so they are a no-no for me.

So, I was very eager to try out Jamberry's matte topcoat when I was given the chance to review one of their topcoats, since this is a brand that I can feel good about buying from.

But of course, the question is...does it mattify the way I want it to? I have tested it out over a variety of polish types to see what it will do...Let's take a look:


First, let's take a look at it over Cult Nails Coveted:

Jamberry matte topcoat over Cult Nails Coveted


The index and middle fingers have Jamberry matte topcoat, while the ring and pinkie do not. The matted nails have that cloudy look that changes the finish but not the color perfectly. The matte creates that nice contrast with the flakies underneath that gives them a different dimension and light, and also allows the teeny glimmers of light to come through in the rest of the polish.


Next I tried it overPicture Polish Mallard:

Jamberry matte topcoat over Picture Polish Mallard

The matte also did a dramatic job here; it creates a wax finish without dimming the flakes. This is a very dark polish to start with, so there isn't as much light coming through as in Coveted, but notice that the different colors in the flakies are all still showing their gorgeousness.


Next, something a little brighter--Hare Polish Asteroid Turf:

Hare Polish Asteroid Turf

Jamberry matte topcoat over Hare Polish Asteroid Turf

This is my favorite way to wear matte topcoat, over a polish that has a high contrast between the base color and the glitter. And the Jamberry passed my test here--this is exactly what I want a matte topcoat to do, to give that flat finish without decreasing the beauty of the polish beneath. These glitters still sing out, and the base color looks smooth and deep. Dare I say it? I prefer this polish with the matte topcoat over the regular topcoat. It looks like a beautiful meadow filled with little purple wildflowers this way. :)

How about a similar glitter that doesn't have quite so much direct contrast? Here it is over InDecisive Lacquer Zea Mays

InDecisive Nail Lacquer Zea Mays


Jamberry Matte Topcoat over InDecisive Nail Lacquer Zea Mays


Just...just...yeah. Do I even need to say it? All of the skill that the maker put into designing the glitter blend and its relationship to the base color remains...but is enhanced. It feels lush, rich, lovely.


And finally, what about a plain old creme? Let's take a look at it over Jamberry's own Cardinal:

Jamberry Cardinal


Jamberry matte topcoat over Jamberry Cardinal


This show best how evenly the topcoat applies; I've tried other matte topcoats that were a bit patchy, but this goes on and dries perfectly.

Jamberry's matte topcoat exceeded all of my expectations, and I feel comfortable putting it into the same category as my personal standard-bearer, China Glaze Matte Magic. If you're looking for a good matte topcoat that is 5-free, cruelty-free, and works extremely well, you can check it out by clicking here. And check out their nail lacquers, they're excellent as well. :)

Hugs and loves!
M.

(Matte topcoat and Cardinal provided for review. All other polishes from my personal collection.)

Before & After: Bandit Brocade

Hello!

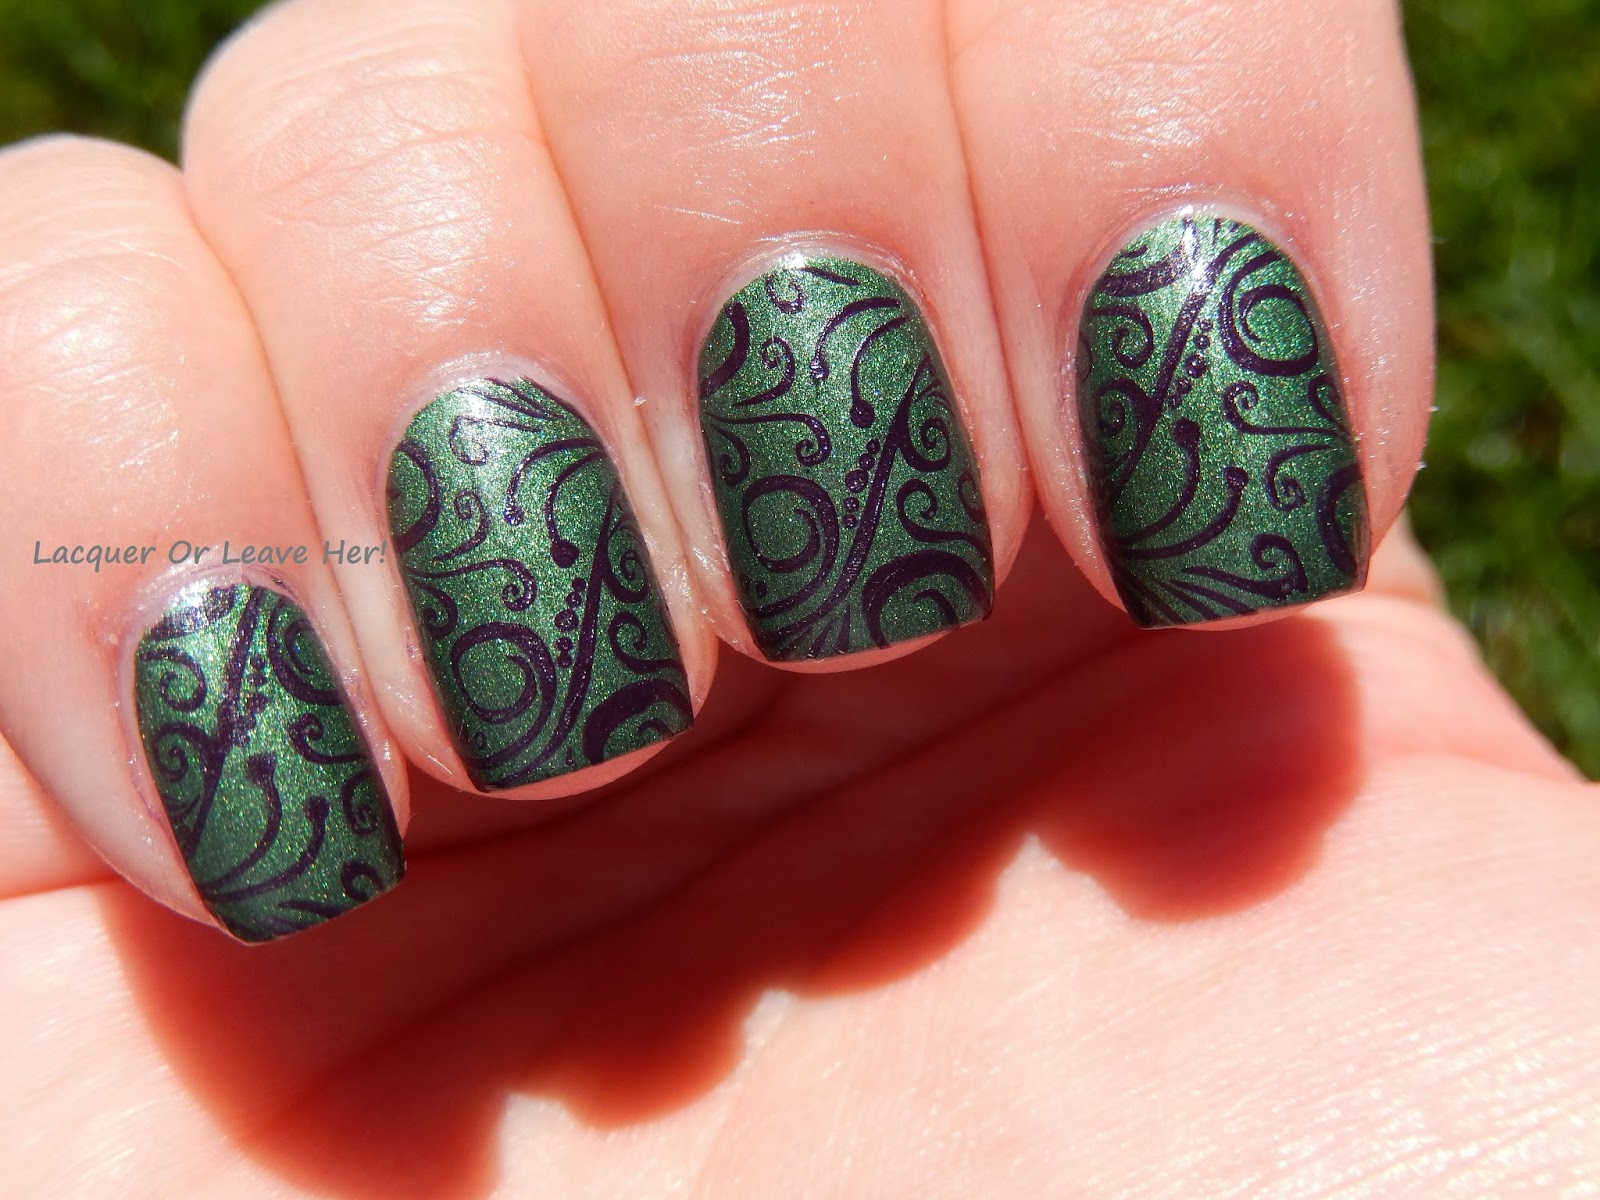
Yesterday I showed you a manicure I did with Mentality Bandit stamped over Mentality Morality. I tried doing the exact reverse, but Bandit was a little too dark for Morality to show over...so I picked a different stamping polish and created my flip-flop of yesterday'a manicure that way. :)

So here's what Mentality Bandit looks like on it's own:


Mentality Bandit


 Next, to get that pop of eggplant over the top, I stamped with Barielle Edgy (originally a press sample) and Pueen 26:


The last one was more sparkly and this one is more smooth. The contrast is more in-your-face, and it has the feel of a velvet brocade holiday gown, at least to my eye.

So...which one do you like better?

Hugs and loves,
M.