Showing posts with label Darling Diva. Show all posts

Wear Test: Living in a material world, and I am a...

*Press Sample*  Material Girl!  Tonight we're going to take a look at my last Darling Diva polish, Material Girl, and see how it fairs in my durability test!

First up, though, is the finale of my getting to know you questionnaire asked of Darling Diva's creative genius, Carrie!

5) How did you become interested in creating your own polish line? 

 Its a drug, seriously. I started out hand mixing stuff because I didn't see what I wanted or I couldn't get what I wanted and people started to ask if they could buy.

6) Tell me 3 fun facts that people wouldn't ordinarily know about you.  (Hobbies, interests, history, etc)

Fun? What is this word fun? ;) Well I am a hockey heuer. Go Wild <sob>, I am super addicted to Redbull, I have a desk full of toys. Hello Kitty, Sponge Bob, Backyardigans lol.

*I was not financially compensated for this post. I received a sample of Darling Diva Material Girl for review purposes.  All other polishes in this review were purchased by me for my own use.  The opinions are completely my own based on my experience. For more information, please see my Disclosure Policy in the tab above.* 


All of the photos interspersed throughout the review portion are from day one.  The wear test info will start on day two.


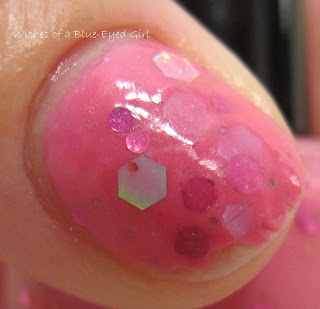
Color: Bright pink with silver, fuchsia, and hot pink hexes and dots in various sizes, including GINORMOUS.
Finish: Glitter Jelly – glitter in a colored jelly base.
Bottle / Brush: Round bottle – the brush and wand are the standard width and length.  Easy to control and manipulate.


Opacity: Medium – achieves opacity at three coats.


Glitter Application: Easy – Spreads evenly without much manipulation.  The base to glitter ratio, however, is such that you won't get a whole lot of glitter on your brush at first.  Instead, it's best to use a few coats to get the desired glitter coverage.  Here, I've used two coats over Lumina Lacquer's I Want You and three coats alone on my ring finger.


Consistency: Fluid – thin but flows easily from the brush.  Thickens up over time as you work on your mani.


Overall Ease of Application: Medium – applies well with minimal pooling or streaking.  Spreads well without much manipulation.


Stampability: Not designed for stamping.

Two coats of Material Girl over Lumina     3 coats of Material Girl alone

Dry Time: Long – dry to the touch with minimal smudging in over 8 minutes.
Overall Thoughts: I have been blown away by the Material Girl collection, for sure.  They have all been stunners and mostly easy to use, aside from my user error on Lucky Star.  Material Girl was no different!  Application was easy, and the effect was nice.  HOWEVER, I'm a moron and tried a new topcoat that refused to dry.  So, I added another layer...  That also refused to dry, but I went to bed and prayed for the best.  Then, I woke up, and it was shrink city.  Womp womp!  Plus, it was all dull from never really drying.  So, I added a coat of Liquid Lacquer's No Time quick dry top coat, and it was finally shiny and dry.  However, it was crazy thick and the shrinkage damage was already done.  I feel like those factors have skewed the test results, unfortunately.  So, let's see how it held up despite yet another one of my blunders.


Items Used for Wear Test: 
Originally, I hadn't intended to wear Material Girl, a glitter, as my wear test from Darling Diva, but it just happened that way. I'm pretty sure that this polish would've lasted longer than the 3 days had I worn a normal tried and trued topper instead of branching out to something new. 

Here's what I used this time:

  • 1 thin coat of Duri Rejuvacote
  • 1 thin coat of Orly Bonder on top of the Duri
  • 2 coats of Lumina Lacquer I Want You on all but ring finger
  • 2 coats of Material Girl on all but ring finger, which is 3 coats alone
  • 2 coats of Miss Sporty Discotheque UV topcoat
  • 1 coat of Liquid Lacquer No Time

Day Two:
Other than shrinkage, there's only one little chip on my thumb, which was actually a screwup on my part.  Otherwise, no problems with chipping.  Just stupid shrinkage.  Ugh.


Day Three:
Finally have my first proper chip on my thumb.  As you can see, it broke a little, so I think that's why I got a chip.  I also broke my middle fingernail, so I had to remove Material Girl before it got worse.


So, there you have it!  It performed better than most of my glitter jelly manis, and it probably would've been way better had I not screwed the pooch and use an unknown variable.  The color is so rich and saturated, it just glows.  I mean, not literally, but it's one of those polishes that definitely catch your eye.  

You can purchase Darling Diva's Material Girl collection soon!  I'm hearing in a week or two!!  Keep an eye on her Facebook and Twitter for news and updates on its release.  You can purchase Darling Diva Polishes at her store, Llarowe, Mei Mei's Signatures, and Norway Nails.

So, what do you think of the DDP Material Girl collection so far?  Which is your favorite?

*I was not financially compensated for this post. I received a sample of Darling Diva Material Girl for review purposes.  All other polishes in this review were purchased by me for my own use.* 

True Blue, Baby I Love You!!

*Press Sample*  I have another Darling Diva Material Girl polish to show you tonight!  True Blue is an extremely unique polish in that it is a linear holo but it also has an in your face shimmer, small glitters, and what I detect to be small flakies.  This may be my favorite of the polishes she sent me for review, which is saying something because did you see Lucky Star?!  Let's hear some more from maker Carrie of Darling Diva, shall we?

3) What was your inspiration for the polishes you've sent me?

A good friend and I were talking about distasteful music and I mentioned Madonna. Then...........yeah well I pulled out a couple of her old CDs and have been rockin that stuff hard. Nothing sweeter than eating your own words, eh?

4) What was your inspiration for your brand name?

My 3 yo niece Zoey Jane. She is the Darling Diva behind Darling Diva. Seriously that little girl has me cracking up every time I see her. I figure if she can put my husband in his place at 3 years old she deserves the recognition lol.


*I was not financially compensated for this post. I received a sample for review purposes. The opinions are completely my own based on my experience.  For more information, please see my Disclosure Policy in the tab above.* 

Alright, prepare for some major picture spam, folks. I had to take photos of this beauty in like five different lights (well, four, direct full sun, overcast, indoors, and flash) so I could get all of the shimmers, flakies, glitters, rainbow, just everything. You'll see. Just scroll down.


Color: Denim blue with teal and copper flakies, shimmer, and small glitters.


Finish: Holographic – pigment gives polish a rainbow in the sunshine. However, this is also a flakie/shimmer, so there is added depth from the extra shimmers.


Bottle / Brush: Round bottle brush – standard width and length.  Easy to control and manipulate.


Opacity: High – opaque at two coats! However, I did three here to ensure my photos captured this beauty in all of its glory.


Glitter Application: Easy – Spreads evenly without much manipulation.


Consistency: Medium – applies easily and doesn’t flood the cuticles.


Overall Ease of Application: Easy – applies well without pooling, dragging, streaking, or balding.  Spreads evenly and smoothly. That's not something that can be said about most holos, so this is a true win in my book!


Stampability: Stamps but the image is not as saturated.


Dry Time: Quick – dry to the touch without smudging in under 3 minutes.


Overall Thoughts: I was blown away by True Blue. Its stunning rainbow is so vivid in the sunshine and even indoors. However, during those moments you don't see the rainbow, you do see the gorgeous shimmer from the added flakies, glitter, and shimmer. Not everyone can pull off a holo with additional shimmers or glitter. It often times muddles the effect of the holo, rendering the rainbow practically non-existent. Carrie, however, nailed it with True Blue. The blue is a gorgeous denim that, while not necessarily unique, is so pigmented that it doesn't require many coats. Despite the fact that the underlying base color isn't unique, the rest of the polish truly is in a class of its own. As for application, I was so pleased with the ease of use for True Blue. It didn't pool, drag, bald, or streak. It was perfect from the get go. If you can only afford to get one polish from this collection, my recommendation would be True Blue for sure.


As I said yesterday, the Darling Diva Material Girl collection has not been released yet. However, keep an eye on Carrie's Facebook and Twitter for news on the release date. Once they have been released, you can purchase Darling Diva polishes at her store, Llarowe, Mei Mei's Signatures, and Norway Nails.

Do you have any other holos that successfully include other glitters or shimmers?

*I was not financially compensated for this post. I received a sample for review purposes.*

Darling Diva's Lucky Star

*Press Sample*  Ok, guys, I'm so beyond excited to show you this polish tonight.  Not only is it super hot, it also glows in black light and glows in the dark!  Lucky Star is from Darling Diva's upcoming Madonna collection.  Let me just say, these polishes are HOT.  Like Madonna from the 80's or early 90's hot before she got all veiny and creepy.  I have two more to show you this week, and I should have the rest to show you soon.  I'm seriously in love.  Now for my favorite part, my interview with maker, Carrie, of Darling Diva!

1) Are all of the polishes you've created in one collection?  If not, what are your collection names? 

Well most recently I had the Back in Black collection based on AC/DC songs, I have a Material Girl collection coming soon based loosely on Madonna songs. This fall I have a "DD" (yes thats bra size lol) collection coming out based on women in comics:) Other than that, in the past I had My Little Pony and a Christmas collection based on the Movie A Christmas Story, other than that I pretty much like to make what I want at the time. I think collections are lovely but so are one offs:)

2) Of the polishes you're sending me, what collection(s) do they belong to? 

Material Girl.


*I was not financially compensated for this post. I received a sample of Darling Diva's Lucky Star for review purposes.  All other polishes in this review were purchased by me for my own use.  The opinions are completely my own based on my experience.  For more information, please see my Disclosure Policy in the tab above.* 


Color: White crelly with hot pink squares in two sizes and neon green and black stars.
Finish: Glitter Crème – glitter in a crème base. BUT WAIT.  IT GLOWS IN THE FREAKING DARK, Y'ALL!!
Bottle / Brush: Round bottle – the brush and wand are the standard width and length.  Easy to control and manipulate.


Opacity: Low – it requires several coats for opacity, but you'll never really get rid of visible nail line.  I will say, I liked it much better layered over itself than over undies.  I've layered it over a Finger Paints white polish whose tag fell off a long time ago on all but my ring finger, which is four coats over itself.  I also tried to layer it over Sinful Shine Wisp, but 1) it wouldn't dry, and 2) there were an insane amount of bubbles.  I tried twice with the same result.  I think it's probably because the Sinful was just too thick to wear as undies.  However, pictured below is Lucky Star over the Finger Paints, which came out nicely.


Glitter Application: Medium – easy to dig the glitters out of the bottle, but it was a little difficult to spread evenly once you get them out due to the base to glitter ratio.  You just have to make sure you don't get too much polish on the brush then you can apply it with the dab method just fine.  You can also apply more than one layer to get the desired result without applying too thickly.


Consistency:  This one is tricky...  I would say Fluid – thin but flows easily from the brush at first.  However, once it's been open for a little while, it gets a little thicker because of the glow in the dark pigment.  I added a couple drops of thinner, then it was perfect!


Overall Ease of Application: Medium – applies with some pooling, but spreads well with manipulation.
Stampability: Not tested for stamping, but I would be interested to see if the glow in the dark pigment would transfer well via stamp.


Dry Time: Long – dry to the touch with minimal smudging in over 8 minutes.  When layered over other polishes, it took some time to dry.  However, layered over itself took only 4 or so minutes to dry without smudging.


Overall Thoughts:  Honestly, the first two times I applied Lucky Star, I did have some problems...  As I mentioned above, I had some serious bubbles.  They clouded the entire nail, and I was so disappointed.  I had a hunch that the problem was really caused by the undies I chose, and I was pretty much correct.  The bubbles pretty much disappeared once I used a different white as undies.  The minimal bubbling you see here is from my stupid wicked thick NBP Glitter Food...  It needed thinning as well.


I also had a bit of problem with the polish thickening as I went through my mani.  I spoke with Carrie, the creator of Darling Diva, and she gave me some tips for glow in the dark pigments.  Long story short, upon her advice, I added a couple drops of thinner, and Lucky Star was good as new!  I always have issues of thickness with glow in the dark polishes, so I wasn't surprised that I'd need to treat Lucky Star a little differently than normal polishes.  


Lucky Star under black light

Once I figured out how to maneuver Lucky Star (a little thinner, less thick undies, and the dab method), I really enjoyed the look of this polish.  It's so bright and reminds me of the 80's and Lisa Frank.  It really is a very sweet polish.


Lucky Star in the dark

The Material Girl collection isn't available yet, but it should be ready for you guys to snap up in a week or two.  You can purchase Darling Diva polishes at her store, Llarowe, Mei Mei's Signatures, and Norway Nails.  Follow Carrie on Facebook and Twitter for news and updates, especially for updates on the release of this B.A. collection.

Do you have any polishes that needed just a little bit of thinner to achieve perfection?

*I was not financially compensated for this post. I received a sample of Darling Diva Lucky Star for review purposes.* 

Indie-licious Review: Darling Diva Polish

Hello!

Today I have five beautiful polishes to show you from Darling Diva polish. I recently fell in love with their Christmas collection, which is inspired by A Christmas Story, one of my favorite movies. When I saw they had a polish called 'Fuuuuuudgee!!!', I almost lost it, I laughed so hard. And when I saw how pretty it was, I knew I had to have it. Then I saw Sheer Poetry...and between the two I couldn't hit click fast enough.

(Oh, I should probably warn you--this post will be PICTURE HEAVY!! But completely worth it.)

Sheer Poetry is a light avocado green holographic polish with red micro glitter and red glitter squares. The holo is a light linear holo with a scattered element to it, too. If you love holos and you love Christmas, this is the perfect polish for you. When you wear it alone, it gives a cool retro Christmas feel, sort of like the colors and feel you see in 'How The Grinch Stole Christmas":


Darling Diva Sheer Poetry


Blurred to show the sparkle :)
This is three coats with Seche Vite on top, and it applied beautifully, no issues whatsoever. What really surprised me, however, was the wear--I wore it like this for three days and didn't get one chip. That never happens with regular polish, let alone holos which I normally can't wear for three hours without a chip!

But maybe you prefer your Christmas greens a little darker...Well, no worry! I also tried it over Color Club Date Night; here is two coats over that green:

Darling Diva Sheer Poetry over Color Club Date Night

Closer up :)


In complete shade--it was hard to find light that didn't have at least some sparkle and holo effect.

Oh. My. Goodness. How pretty is that? I wore this to a birthday gathering in a dark pub in the city, and even in that dim light, there was still sparkle to this. If there is any light around, it will pick it up and you'll get shine. The line in the linear holo that you see isn't here strongly, but the gorgeous holo scatter holds up and is just gorgeous. ::sighs with pleasure::

Next up is Fuuuuuuudgee!!!!!!. If you aren't familiar with this scene in the movie, you can see the moment in all of its glory here...poor Ralphie:


As for the polish, it's a clear-based polish with micro glitters, medium hex glitters, and square glitters. They are primarily metallic colors, with a sprinkling of other colors mixed in. It does remind me of those awesome fudges with cool stuff in them, or of fruitcake (I'm one of those strange people that actually loves fruitcake). Take a look:

Darling Diva Fuuuuuuudgee!!!!!! over China Glaze Bending Over Backward


This is one coat over China Glaze Bending Over Backward, with no special dabbing or fishing, just brushed on. Application was very nice, but what I love best about this polish is it's a well-thought-out combination of glitters that gives a very pleasing effect with different colors and textures, without it being a crazy glitter bomb. It has style and sass. It also has elegance and class, as you can see here in a gradient I did over China Glaze Hook and Line:


Fuuuuuuudgee!!!!!! over China Glaze Hook And Line


Sparkle wonder powers unite!
 I honestly can't imagine a color this polish wouldn't look beautiful over. So versatile!

Next up is Seriously Serious, a glitter polish made of very small glitter in purple and greenish-blue. The polish-maker warn you not to put this over purple, because it won't show the colors well, so I tried it over a light metallic green, and I love the effect:

One coat of Darling Diva Seriously Serious over Finger Paints Be Leaf It Or Not
Two coats of Seriously Serious

Blurred to see the sparkle

I like it with one coat for a soft wash of sparkle, but I really adore it with two coats, because of the saturated effect it gives. The proportions of the colors in this glitter are very well-executed, and the effect is mesmerizing. It's hard to see the full impact of this polish in the first two pictures, so I took a blurry shot so you can see the beautiful sparkle a bit better. Application was perfect, and I can't wait to play with this more. :)

Next up is Dook At Me, a holographic topcoat with a spray of holographic square glitters. I love the name on this--it's named after the polish maker's niece, who says 'Dook at me' instead of 'Look at me'; I love the story behind it both because it's so darned cute, but also because this polish captures the fairy-princess magic of being a young child. There are a lot of holographic top coats out there in polish-land, but this one is just a little bit more special...when the polish is indoors and the holographic sparkle doesn't show up so much, the square glitters give it extra flash, and that makes the polish special in all lights, not just the ones that bring out the linear holo.

First let me show you a picture of the undie alone, for comparison purposes; notice how in the shade shot the topcoat lets the near-duochrome finish of this polish shine through, and doesn't cover it like many holo topcoats would:

Finger Paints Art You Blue?


Darling Diva Dook At Me over Finger Paints Art You Blue?

Darling Diva Dook At Me from an angle to show the linearity


Dook At Me in the shade; how pretty is that??

I didn't know what to expect  from this polish, but was so excited at how pretty it looked, I forgot to clean up my cuticles for the shot. Bad, bad polish reviewer. :(

Finally, I'll end on a very high note with Auld Lang Syne, aptly named because it would be perfect for New Year's Eve manicures. This is a gold holographic topper that has just enough larger glitters to give it a splash of texture that makes it extra-special. The sparkle is amazing and the color of the gold is rich. I couldn't help but try it over several polishes, and then I couldn't choose which one to show you, so I'm going to show them all! Unfortunately, this was a very frustrating polish to photograph; it's so much sparklier and holographier than it shows here!

First, here it is over China Glaze Running In Circles:

Darling Diva Auld Lang Syne over Running In Circles in direct sun


Blurred to show the holo sparkle

Next I have it over Color Club Model Behavior:

Darling Diva Auld Lang Syne over Model Behavior 


And finally, my favorite combination, layered over a-England Perceval:

Darling Diva Auld Lang Syne over a-England Perceval

This is the truest representation of how the colors look together :)


Blurred for your holographic sparkle entertainment

 All of these photos have one coat of Auld Lang Syne--I didn't feel a need for a second, the sparkle was so pretty with just one, but I can't wait to do gradients with a thicker layering of it. Application was really great, although if you want to guarantee a large gold hex on each nail, you may need to fish a bit for it. But who cares, with a polish this pretty!

You can find these polishes at the Darling Diva Etsy shop by clicking here. There a so many more gorgeous polishes to explore there as well--so many I can't wait to get my hands on, including several really unique holographic polishes. The polishes range in price depending on the components, and are comparable to other independent polish makers. Take a look, I promise you won't be sorry. :)

Thanks for taking a look!

Xoxox,
M.

(Sheer Poetry and Fuuuuuuudgee!!!!!! were purchased with my own money. The other polishes were sent for review.)