If you didn't know, my store is having a sale right now, and since I'm a dumb dumb that doesn't understand that technology stuff, the fixed code will be up until midnight tomorrow night. All orders will receive 13% off with the promo code "Halloween" - so click here to order! Also, there are only a few more hours to get your donations in to I Need a Lighthouse (or you can send them to me via paypal if you'd rather). More information on that is located here, here, and here.
Ok, we won't be doing a Comparison Thursday today since it's Halloween, which is my FAVORITE holiday of the year. Instead, I'm going to show you some of the Halloween looks I've been rocking this month. Bear with me as these photos were taken with my iPhone and might not be the best quality coupled with the fact that my nails are a right mess. Without further ado, and in no particular order, my Halloween manis!
**All polishes were purchased by me.**
Lynnderella Are You a Good Witch over Rescue Beauty Lounge Piu Mosso.
Witch is a clear based polish with a blue shimmer and glitters in all sorts of shapes and sizes but that focus more on the darker side of the spectrum. Part 1 of the Lynnderella Halloween inspired Twin Set. Piu Mosso is a deep navy creme with a strong copper shimmer.
Lynnderella Ghouls Just Want to Have Fun over Wet 'n Wild Fantasy Makers Darkest Hour, Once Upon a Time, and Ghouls Rush In.
Ghouls Just Want to Have Fun is a clear based polish with a pink to blue shimmer and multicolored glitters. Part 2 of the Lynnderella Halloween inspired Twin Set. Darkest Hour is a plain black creme. Once Upon a Time is a silver foil. Ghouls Rust In is a really nice bright orange jelly.
Lynnderella Gotta Love Brains with Illamasqua Raindrops.
Raindrops is a grey based polish with silver-grey flakies. Gotta Love Brains is a pale grey base with a pink shimmer and hexes and squares in silver, purple, pink, and blue. This is two coats of Raindrops and three coats of GLB without undies. I wasn't sure how I'd like either of these, but this may be my favorite non-art mani this year.
Lynnderella All Hallows Eve over Elevation Torres del Paine.
All Hallows Eve is a green polish with various shades and sizes of green and black glitters. Torres del Paine is an amazingly luscious green creme that is opaque in one coat. Flawless application! I took it to the next level by using NYC Matte me Crazy.
Orange Gradient
I used 5 different polishes following this technique to get this look. I was absolutely IN LOVE with this mani. It's just sooo pretty. I used (from cuticle to free-edge): Elevation Matsuda, Deborah Lippmann Footloose, China Glaze Riveting, Elevation Sarychev, and Elevation SBP Llulluillaco.
Candy Corn Holo Gradient
I used the same technique as the one above for the gradient (from cuticle to free-edge): Model City Polish Corn Maze, OPI Coral Reef, and Indigo Bananas Do You Have a Flag? I then stamped on my accents with Konad Special Black using my new Bundle Monster Holiday plates (BM-H07, BM-H06).
So, if you celebrate it, what did you do for Halloween? If not, what was your Thursday mani? I'll be doing something a bit different next month, so check back tomorrow for that. Also, please be aware that the Depression Awareness Giveaway will take time to verify as I will be awaiting the information from the charity, so please be patient as I get all of the verification information in.
**All polishes purchased by me.**
Showing posts with label Elevation. Show all posts
Guest Post: Peer Pressure Polish and Elevation Epidote
Hi there fellow lacquer lovers! My name is Jennifer and I run Peer Pressure Polish. I'm just a quick guest post here while Julie is away from her blog. I named my blog Peer Pressure Polish because if I see a polish on someone or on a lot of people I feel compelled to own it. If you tell me I need it, or it's popular I must have it in my life. The polish I am going to share with you today is one of those. This is Elevation Polish Epidote. It is a beautiful Army green holo polish. I first saw this on Instagram from @thepolishaholic. It was so pretty and I had to have it I had no issues with application, this is three thin coats and I was able to wear it about four days. I got so many compliments on this polish. Which was shocking to me, I thought it was going to be a polish only I was going to love. I used a base of Duri Rejuvacote and I used Glisten and Glow HK Girl as my topcoat.
I really wish there had been some sun going on when I had this on, because I couldn't see the full holo effect with the cloudy weather. Thanks for reading my guest post! Jennifer
_______________________________________________________________________________
Wow, that's one Elevation I've been going back and forth on, but I'm seriously wanting it now! Many thanks to Jennifer for her wonderful guest post!
_______________________________________________________________________________
Wow, that's one Elevation I've been going back and forth on, but I'm seriously wanting it now! Many thanks to Jennifer for her wonderful guest post!
Elevation Polish Higravstinden aka "Hig"
Tonight's post is going to be quick and dirty. I'm almost to a place in my life after the move and general work business where I can fit in regularly scheduled blog posts. Almost. Not quite yet, though. So, while I spend the next few days (maybe a week?) doing this:
I hope you'll all bear with me as I get my act together. I promise, it'll be worth it in the long run!
Tonight, we're going to check out Elevation Polish's Higravstinden aka: Hig. I'm glad she has an aka, otherwise, I might cry if I had to write that out every single time! Ok, let's get to it!
Overall Thoughts: I'm not entirely certain what took me so long to wear this. It's one of my oldest Elevations, and I just now put it on my nails? What a travesty. Hig applied so easily that there was almost no cleanup required. I LOVE polishes like that. I am so bad at application sometimes as I don't have the steadiest of hands or the most patience, so when I find a polish that applies well, I will sing it's praises to the rooftops! I also loved the blue shimmers, which were way more prominent in person than in my photos. It's the perfect medium teal shimmer that everyone should have, really. There's no excuse not to. Except, well, there's one tiny catch... It's been discontinued. BUT DON'T WORRY! There are still some in stock, which I've linked below! If you like this bad boy, you'd better grab it quick before it's gone for good!
You can purchase Elevation Polishes at Lulu's store, and if you like this polish, you definitely need to grab it soon! Follow her blog for info on restocks and new additions to her line.
*I was not financially compensated for this post. All items in this review were purchased by me for my own use. The opinions are completely my own based on my experience. For more information, please see my Disclosure Policy in the tab above.*
(Source)
I hope you'll all bear with me as I get my act together. I promise, it'll be worth it in the long run!
Tonight, we're going to check out Elevation Polish's Higravstinden aka: Hig. I'm glad she has an aka, otherwise, I might cry if I had to write that out every single time! Ok, let's get to it!
*I was not financially compensated for this post. All items in this review were purchased by me for my own use. The opinions are completely my own based on my experience. For more information, please see my Disclosure Policy in the tab above.*
Color: Vibrant teal with blue and teal shimmer.
Finish: Shimmer – a polish that shimmers in the light due to fine particles that refract light.
Bottle / Brush: Rectangle bottle – ribbed cap that is a little hard on the hands to open if you have sensitive skin. The wand is the standard length, but the brush is a little too thin to pick up large / shaped glitter without fishing. The brush's width is also, typically, an issue for spreading. It doesn't fan out and pretty much requires you to dab polishes that are densely packed with glitter. However, in this instance, the brush was fine handling Hig's application, which was nothing short of amazing.
Opacity: Medium – achieves opacity at three coats.
Glitter Application: N/A
Consistency: Medium – applies easily and doesn’t flood the cuticles.
Overall Ease of Application: Easy – applies well without pooling, dragging, streaking, or balding. Spreads evenly and smoothly.
Stampability: Not tested for stamping.
Dry Time: Medium – dry to the touch with minimal smudging in 3-8 minutes.
You can purchase Elevation Polishes at Lulu's store, and if you like this polish, you definitely need to grab it soon! Follow her blog for info on restocks and new additions to her line.
*I was not financially compensated for this post. All items in this review were purchased by me for my own use. The opinions are completely my own based on my experience. For more information, please see my Disclosure Policy in the tab above.*
Jindie Polish Sparkle on the Vine
Man oh man. Today has been a super busy day. I had a doctor's appointment, and then I had to promptly get to work. Which I just finished... Yeah, loooooong day! Anyway, let's take a quick look at Jindie Sparkle on the Vine, a super gorgeous glitter topper! Then, I'm off to bed. I'm pooped!
*I was not financially compensated for this post. I received a sample of Sparkle on the Vine for review purposes. All other polishes in this review were purchased by me for my own use. The opinions are completely my own based on my experience. For more information, please see my Disclosure Policy in the tab above.*
Overall Thoughts: Here I've paired Sparkle on the Vine with Elevation Echinops, which you can see here. I find this pairing perfect as you can still see the lighter and more delicate glitters all while making the bolder glitters pop with more vibrancy. Application was easy, but I did have to flip the bottle upside down and then fish a bit to get the larger dots out of the bottle. Otherwise, the rest of the glitters came out well. I used the dab method for spreading them, but you could easily brush it on like normal for a less dense and more sparse look. Even though this feels more like a spring polish, I still love it and would definitely wear it any time of year. I really want to try it with a jelly sandwich next time. Maybe with OPI Care to Danse. Which do you think it would work best with, a lighter color or something brighter?
You can purchase Jindies at her store here. You can also purchase Jindies from her stockists Llarowe, Mei Mei's Signatures, Ninja Polish, Harlow & Co, and Femme Fatale. Follow Jen from Jindie on Facebook, Twitter, and Instagram.
*I was not financially compensated for this post. I received a sample of Sparkle on the Vine for review purposes. All other polishes in this review were purchased by me for my own use. The opinions are completely my own based on my experience. For more information, please see my Disclosure Policy in the tab above.*
Color: Clear base chock full of squares, hexes, and small, medium, and giant dots in silver, teal, green, purple, and fuchsia.
Finish: Glitter Top Coat – glitter in a clear base to be worn as a top coat.
Bottle / Brush: Tall round bottles with round cap - the cap is a little awkward to hold because it’s so round but also pretty short. If you have a hard time holding caps, this bottle type might be difficult for you. The wand and brush are long and slender allowing you to grab glitters from deeper within the bottle but making it a little more difficult to get the larger glitter pieces to stay on the brush.
Opacity: Glitter topcoat – not designed for full opacity.
Glitter Application: Medium – requires the dab method, but the small to medium sized glitters are easy to extract and spread evenly. The giant dots do require a little fishing and placement, though.
Consistency: Medium – applies easily and doesn’t flood the cuticles.
Overall Ease of Application: Medium – applies well with minimal pooling, dragging, streaking, or balding. Spreads well without much manipulation.
Stampability: Not designed for stamping.
Dry Time: Medium – dry to the touch with minimal smudging in 3-8 minutes.
You can purchase Jindies at her store here. You can also purchase Jindies from her stockists Llarowe, Mei Mei's Signatures, Ninja Polish, Harlow & Co, and Femme Fatale. Follow Jen from Jindie on Facebook, Twitter, and Instagram.
*I was not financially compensated for this post. I received a sample of Sparkle on the Vine for review purposes. All other polishes in this review were purchased by me for my own use. The opinions are completely my own based on my experience. For more information, please see my Disclosure Policy in the tab above.*
Elevation Echinops
When Lulu started making holos, I was pretty excited. I'm not going to lie - I love me some Elevations, which is obvious if you look at my stash. I probably have more Elevations than any other indie except Lynnderellas. I love the variety of finishes and colors she offers, so I was definitely intrigued when I saw her foray into holos, Muztagh Ata. Sadly, it's still in my untrieds. However, I do have my second Elevation holo on the blog tonight. Let's take a look at the delicate and subtle beauty that is Echinops.
Overall Thoughts: If you're looking for an in-your-face holo like the Color Club Halo Hues, you'll be quite disappointed. HOWEVER, this large particle loose rainbow is still really pretty. It doesn't come out to play easily, though, and definitely tried to play hide-and-seek with my camera, the little skamp. I love that the color is definitely a different kind of purple than a lot of the other purple holos in my collection. Lord knows I have a million purple holos! This one leans periwinkle at times, which is really pretty, but it's not a straight up periwinkle. I also feel like it's a more pigmented giving it a heartier look than the sometimes watery holo you typically see. I'm a little disappointed with the prism, though, as I was definitely hoping it would be stronger. It will be the perfect undies for a lot of my glitter toppers, which you'll see one combo tomorrow. Echinops may not have much rainbow power, but I'm pretty sure that the new holos she just released have a much stronger effect. I'm looking forward to grabbing one to test out.
You can purchase Elevation Polishes at Lulu's store. Follow her blog for info on restocks and new additions to her line.
*I was not financially compensated for this post. All items in this review were purchased by me for my own use. The opinions are completely my own based on my experience. For more information, please see my Disclosure Policy in the tab above.*
Color: Soft lavender base with scattered holo.
Finish: Holographic – pigment gives polish a rainbow in the sunshine. Keep in mind, this is a different kind of pigment than what you normally see in holos. It's a looser rainbow due to the pigment's large particle size that isn't as in your face as other holos.
Bottle / Brush: Rectangle bottle – ribbed cap that is a little hard on the hands to open if you have sensitive skin. The wand is the standard length, but the brush is a little too thin to pick up large / shaped glitter without fishing. The brush's width is also an issue for spreading. It doesn't fan out and pretty much requires you to dab polishes that are densely packed with glitter.
Opacity: Medium – achieves opacity at three to four coats.
Glitter Application: N/A
| Under the light of my ice maker... Always the best lighting to show shifts and holos. |
Consistency: Medium – applies easily and doesn’t flood the cuticles.
Overall Ease of Application: Medium – applies well with minimal pooling, dragging, streaking, or balding. Spreads well without much manipulation.
Stampability: Not tested for stamping.
Dry Time: Medium – dry to the touch with minimal smudging in 3-8 minutes.
You can purchase Elevation Polishes at Lulu's store. Follow her blog for info on restocks and new additions to her line.
*I was not financially compensated for this post. All items in this review were purchased by me for my own use. The opinions are completely my own based on my experience. For more information, please see my Disclosure Policy in the tab above.*
1 Year Blogiversary Prize 2
Again, this is going to be picture heavy, so less chit chat and more photos! All of the polishes in this post were either purchased by me or donated for the giveaway and not for review. Tonight, I only have three polishes from the prize to show you as well as an example Avon - a different color but from the same collection. Let's get down to business! As always, click on the photos to enlarge them. To enter, go HERE.
Here's the second prize again:
Prize Two
Sponsored by Wishes of a Blue-Eyed Girl, Kelara Lacquers, Polished 10, Soflajo, Elevation Polish, Sharla Sells Avon, and Nail Bed Dreams.
Kelara Lacquer Happy Blogiversary, Color Club (unnamed pink), Blue-Eyed Girl Lacquer Birthday Wishes, Soflajo My Sign's Aqua-rium, Elevation Polish Magens Bay, LA Girl 3D Dazzling Pink, Avon Saturn, Julie G Gumdrop Rock Candy, and Bath and Body Works PS I Love You Shower Gel.
And here are bottle shots of the polishes in the prize:
Avon Starburst
The first polish I want to show you is Avon Starburst, which is a scattered holo in dark fuchsia. The Avon in the prize is Saturn, which is an orange scattered holo.
Can I just say that this polish was AMAZING?! Like, seriously amazing. It probably could've been one coat, but, as you guys know, I'm weird and did two.
These photos are zero cleanup. ZERO. CLEANUP. Do you get what I'm saying?! Amazing polish. Such depth and opacity. I'm almost speechless. Looking forward to trying my hand at stamping with this beauty!
Kelara Happy Blogiversary
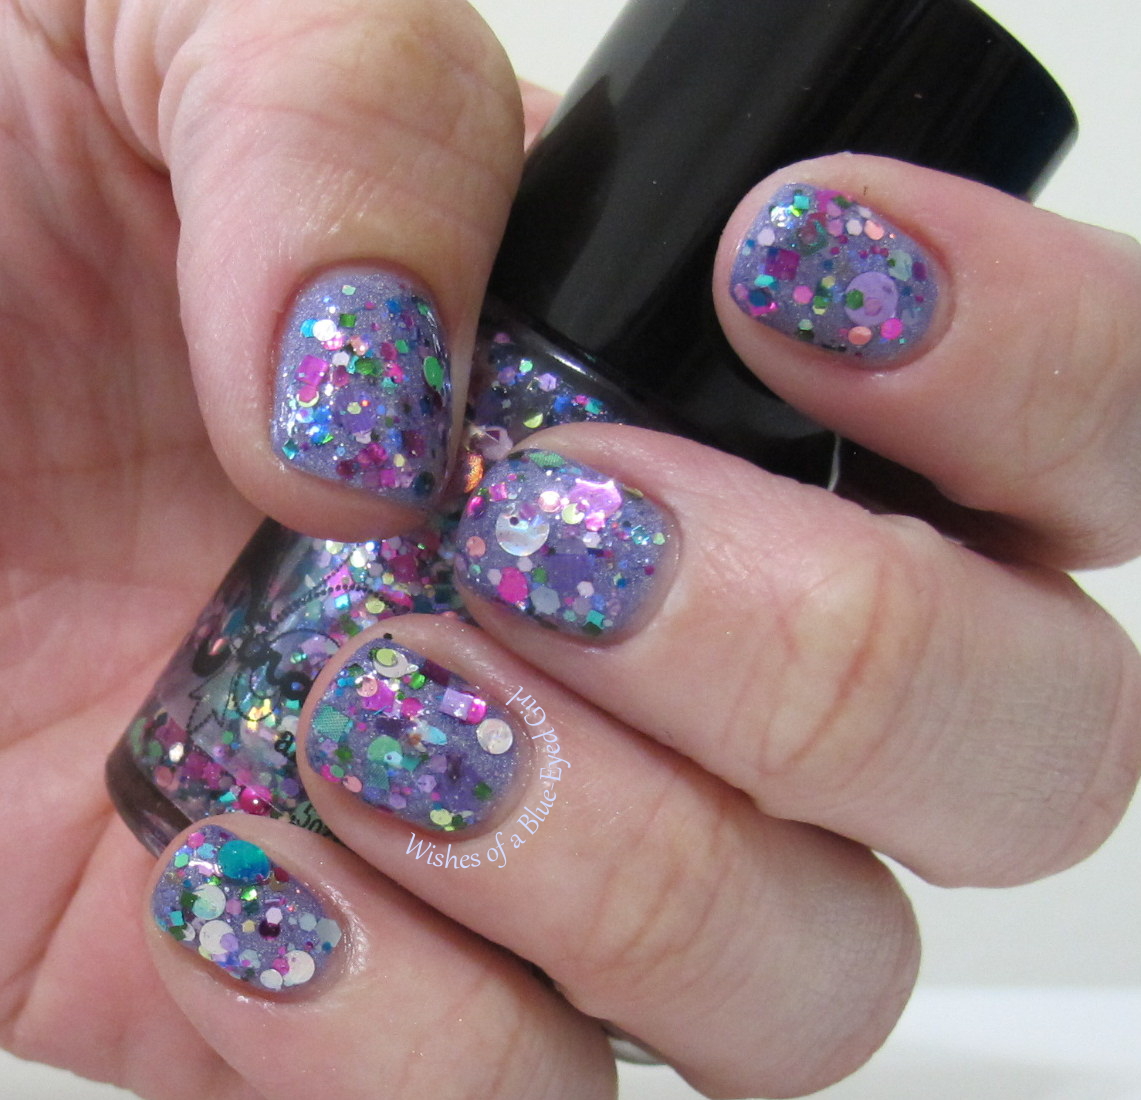
I used 1 coat of Happy Blogiversary over Barry M Strawberry Ice Cream. Happy Blogiversary is a pink shimmer with multiple color and sized hexes.
Application was easy. The brush strokes in the macro aren't evident at all to the naked eye.
Here it is with NYC Matte Me Crazy.
Since this was a custom, you can only get this polish from my giveaway!
SoFlaJo My Sign's Aqua-rium
My Sign's Aqua-rium is a glittery teal matte.
Application was easy, but it took a little bit longer to dry than the others. This is three coats without a topcoat.
Here it is with HK Girl topcoat.
And here it is shiny with topcoat but blurred so you can see those gorgeous glitters.
Elevation Magen's Bay
Elevation Magen's Bay is a custom I had made for me by Lulu, the creator of Elevation. I sent her photos of Magen's Bay in St. Thomas, Virgin Islands as inspiration, and this is the beauty she came up with!
A light teal base with teal and light blue dots, hexes and squares.
This is two coats. Super easy application with a very quick dry time.
Again, since this was a custom, you can only get this polish from my giveaway!
You can get Avon products from my awesome Avon Lady, Sharla, and you can follow her page here. You can purchase Kelara at their store. Follow Tara and Kellen on Facebook and Twitter. You can purchase SoFlaJo at her store and on Etsy. Follow Jody on Facebook. Lastly, you can get Elevation polishes at her store and Llarowe. You can keep up with Lulu at her blog.
Aren't you guys loving these customs?! I absolutely love them all! And, man, I'm digging all of the holos in these prizes!
Subscribe to:
Posts (Atom)