Showing posts with label guest blogger. Show all posts

Guest Post: Color Me So Crazy with PolishTBH

Hello and a big THANK YOU to Julie for letting me do a guest post for her! I am such a super fan of Wishes of  a Blue Eyed Girl and all that she does! So, anyway since she supports me and my endeavors I will always support her! So I was going to prepare a little Halloween Art Tutorial for you all, but that failed- story of my Nail Life!!! I decided to do the next best thing- THERMALS!!

I will be showing you all Island Fantasy by Polish TBH. I used to rock the thermals when I was a tweeny, but now they are back and I love them!! This one is a turquoise/ teal base with gold glitter. It changes to a bright yellow/ green in warmth and it's flipping awesome!! When I put this on, I was reminded that I totally need to get more thermals. BUY ALL THE THERMALS! *hint hint* Julie :)

Anyway, before I chit chat your ears off, here are the pics. Enjoy and be sure to check me out on my Bloggy Blog, Facebook, Instagram, Twitter. Google Plus and Pinterest!


These two above are just normal wear in room temperature. Well, at least my room temperature. No temp manipulation at all.


This is after the cold water dip. I literally ran my nails under cold water for about 10 seconds. 


This is after about a 10 second stint under warm/hot water. 


This is under warm/hot water with a flash to show the bright yellow. I also dipped the bottle under water- which by the way, don't do. My label is no longer there. TBH bottles are apparently not meant to be dipped under water :( 


These last pictures are of the tips dipped in cold and rest under warm/hot. 


The only issue that I had with this polish, besides the dissolvable label, was that the polish kind of got "stuck" for a little when it was shocked in between extreme temps. I had run it under warm water and it literally stayed that bright yellow for about an hour before I finally painted over it. The bottom line is I need to get more thermals!!!


Polish TBH- Island Fantasy
_________________________________________________________________________________

Yeah, I don't have any thermals, but this post has seriously made me realize I need to add some to my ISO list!  Thank you so much for showing us this gorgeous polish, Brigitte!  Don't forget to go and follow her over at Color Me So Crazy!

Guest Post: Adventures in Polishland with a Geometric Glitter Mani

Happy Friday from Adventures in Polishland! I'm so excited to be writing for Wishes of a Blue-Eyed Girl today. I thought it would be fun to put a spin on my favorite nail art look, and create a fall-inspired, geometric glitter manicure. While I typically rock light-toned hues, when the weather turns cold I grab the darker polishes. Let me share the edgy manicure I created!

  IMG_3411

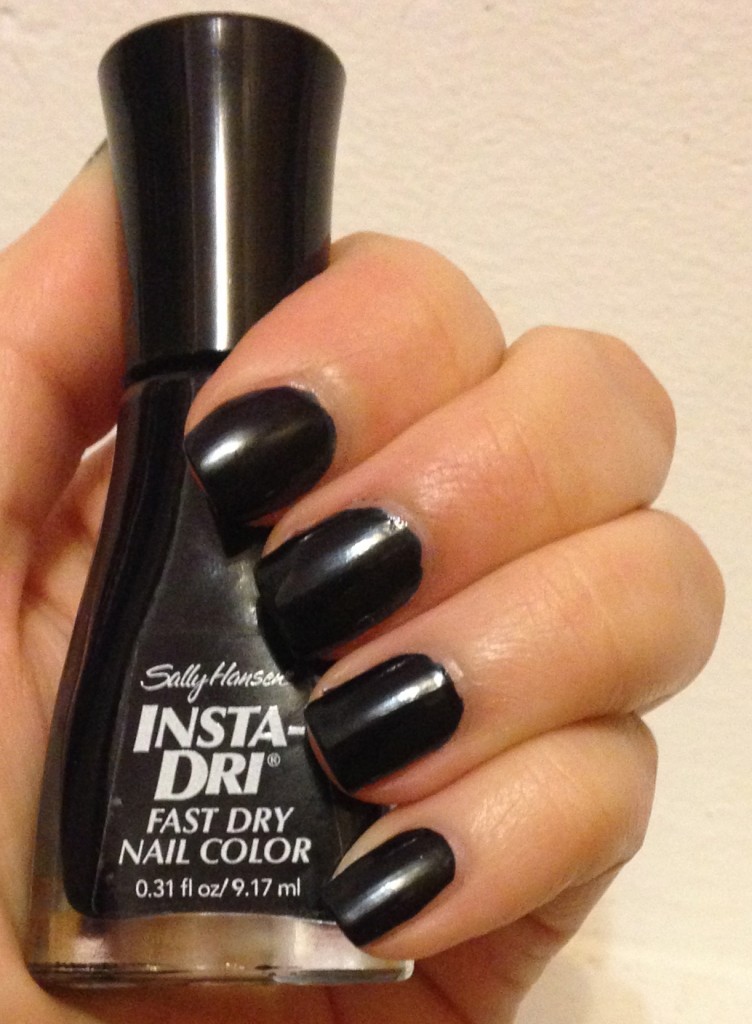
I began with Sally Hansen Insta-Dri in Night Flight, a dark blue polish that looks almost black. Night Flight has a perfect formula that is opaque in two coats. The fast-drying formula is also perfect for a geometric manicure because I am too impatient to wait for anything else to dry. After about five-ten minutes, I was ready to grab the scotch tape and get to glittering!

  IMG_3413

IMG_3416

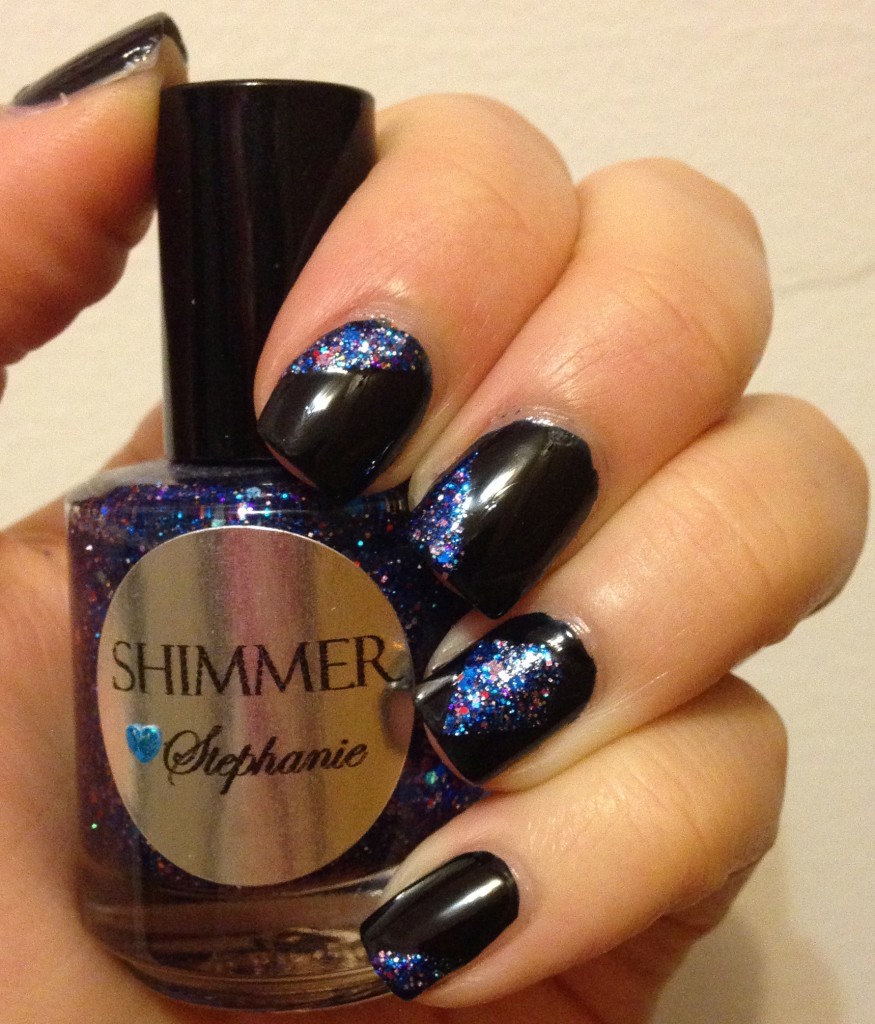
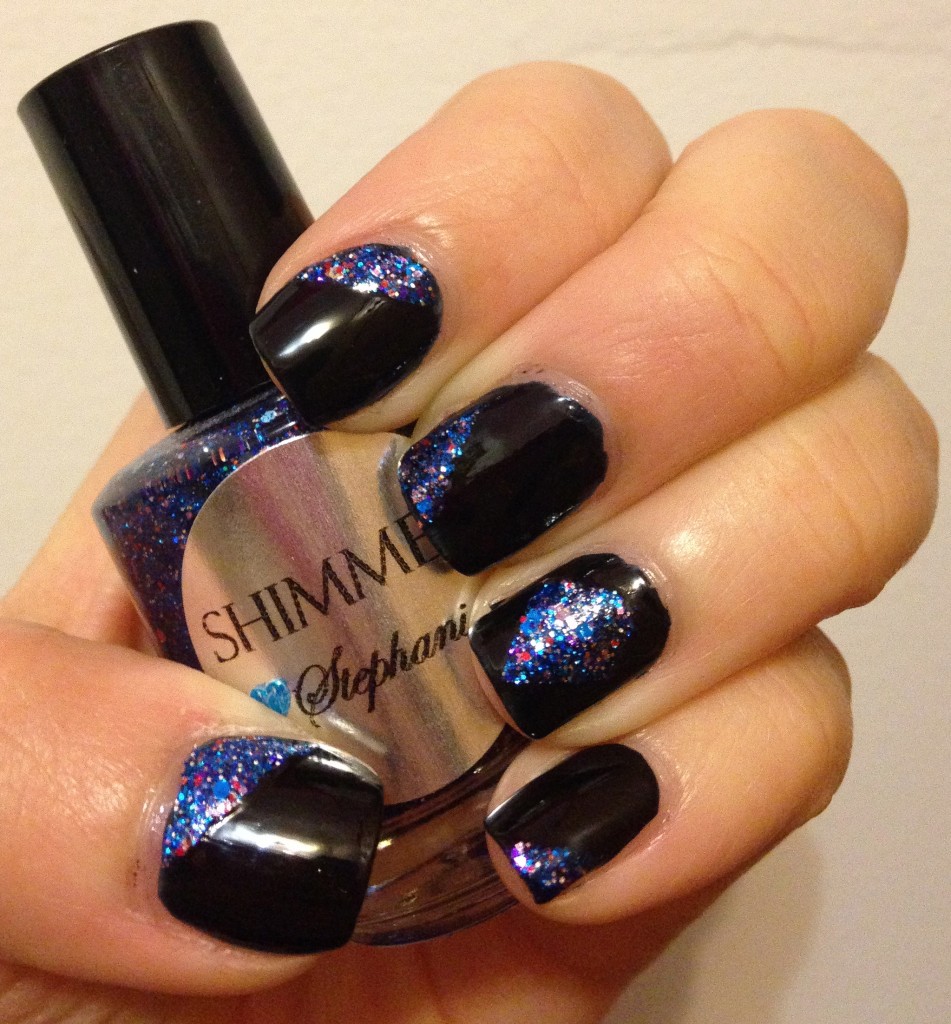
To create a geometric look, I decided to place a diamond on my ring finger as an accent, and then rotate triangles on my other nails. All you need is tape to achieve this look! Simply place the tape where you want the design to be, apply your glitter polish, and peel off the tape while the polish is still wet. I used Shimmer Polish in Stephanie since the colors really complimented Night Flight. Plus, Shimmer Polishes are quite densely packed, so I knew the glitter would be opaque!

  IMG_3417

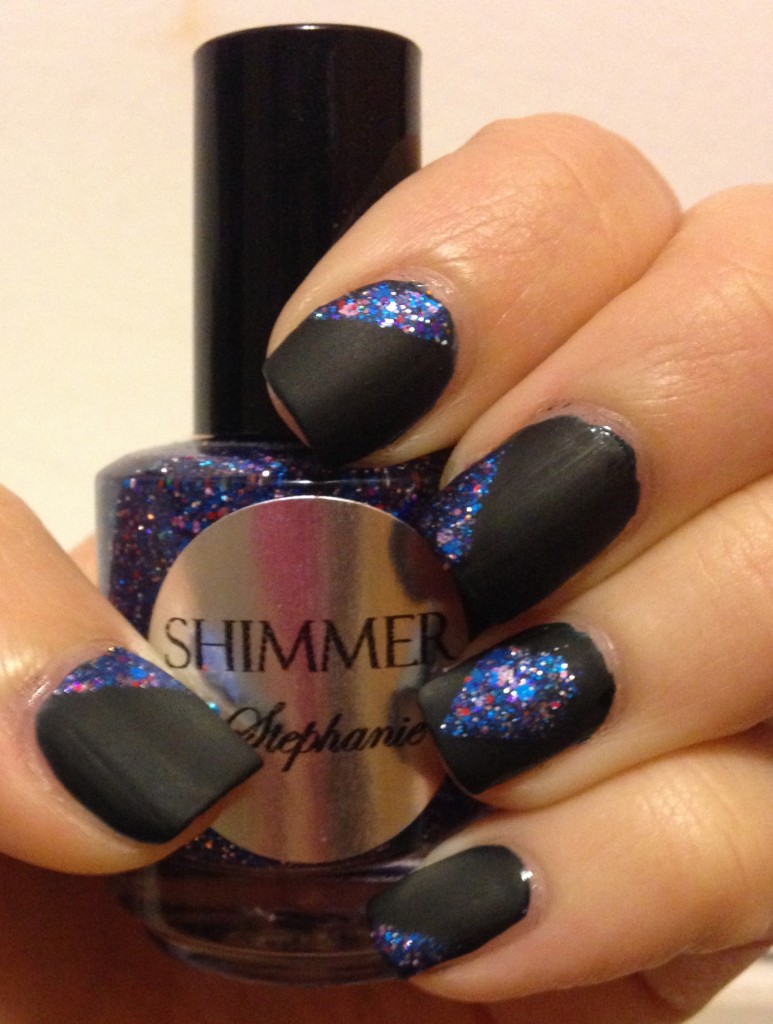
As a final touch, I added a matte top coat to my manicure. I just love the look of matte glitter! It really makes the glitters pop, and it makes the color portion look like vinyl. I used butter LONDON Matte Finish, but any matte top coat will do! Of course, you can use a glossy top coat if you prefer. And that is my complete geometric glitter manicure for fall! This nail art technique is so easy to create, and you can customize it to your own tastes by using different colors, glitters, and designs. The possibilities are endless! If you liked this look, please head on over to my blog Adventures in Polishland for everything nail polish and beauty. I would love to see you there!

_________________________________________________________________________________

Thank you again, Christina, for taking over my blog for the day!  Wow, that is a suuuuuper cool look  that I think I could actually pull off!  You guys know me and my lack of artistic tallent, but this is super pretty and seems like it wouldn't be too difficult to do!  Make sure you go follower Christina at Adventures in Polishland!

Comparison Thursday: Guest Blogger Style - Grey with Red Glitters

Hi, Wishes of a Blue-Eyed Girl readers! I'm Sara from Born For A Storm. I'm stepping in for today with a quick comparison post for Julie! (Disclaimer: both of these polishes were purchased by me, because I feel the need to own every grey thing in the world.) Today we're going to be looking at grey jellies full of red glitter!


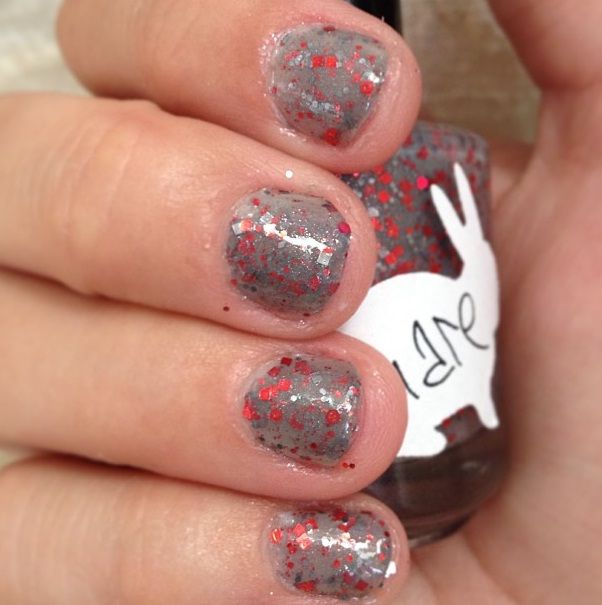
Hare - Swanky Soiree. This polish was a Holiday 2012 limited edition from the brand. Isn't it beautiful? I missed it when it came out but was finally able to track it down via a blog sale. Lucky! It's a grey jelly with hex and square shaped red glitters. There's also a few grey glitters in it and a subtle silver shimmer. It's gorgeous, but you can't get it anymore, which leads me to...


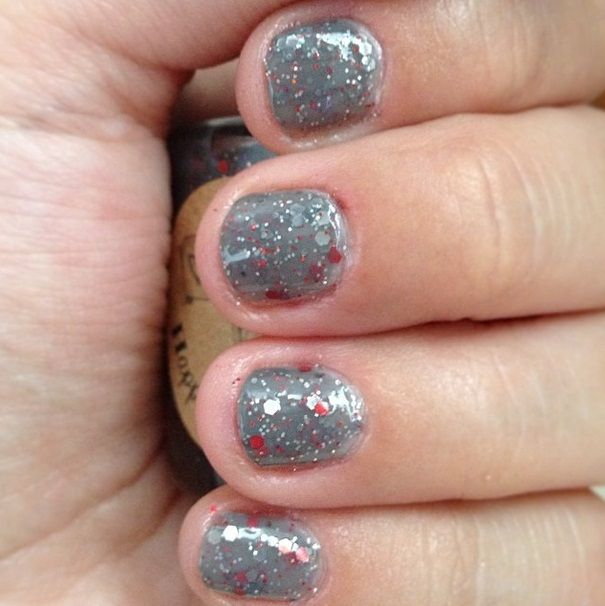
Happy Revolution - Flip Flip Flipadelphia. This polish is so similar that it's silly to own both. (Unless you are me, who needs to own all the grey.) It's a grey jelly, with red, silver, and grey glitters. The main difference is that there is a lot less red and silver shimmer in this polish than in the Hare, but I still think it's similar enough to be an adequate substitute! This polish was an It's Always Sunny In Philadelphia-inspired collaboration between Happy Hands and Polish Revolution and is currently available in both of their shops. (My lighting was a little different for this photo and I apologize. I promise they are both very, very similar.) Both of these polishes are shown with basecoat, 2-3 coats of polish, and topcoat. They both got a little gloopy as I added coats, as glitters tend to do. I wasn't surprised by this, and I don't think that it's necessarily a flaw in the polish; it's just something that happens. I think, in the future, when I'm wearing them instead of just doing swatches, I would put on an opaque grey cream, and then just one or two coats of polish. I hate when glitters get really thick, so using a base polish is something that I really like to do. Both of these dry a bit gritty, so a thick coat of topcoat would be a good idea. In conclusion, both are gorgeous, one of them is still totally available. If you want to come over and follow my blog, you can click here or follow me on Bloglovin'! Though, I will say that I post more frequently on Instagram, so you can follow me there as well, if you want. Many, many thanks to Wishes of a Blue-Eyed Girl for hosting me today!

_________________________________________________________________________________

A huuuuuge thank you to Sara from Born for a Storm for doing my weekly comparison post!  I don't have either of these polishes, so I'm super glad she volunteered!  Make sure you're following Sara over at Born for a Storm, but DEFINITELY make sure you're following her on IG because she's more active over there.

Guest Post: Nailbed Dreams and the Sparkliest Mani I've Ever Seeeeeen!

Hello, there! I'm Emma from Nailbed Dreams. I'm honored to be here on Julie's awesome blog. I'm here to share with you my newest manicure concoction. I've layered 5 of the sparkliest polishes I own, and came out with an awesome mani! Let me share my recipe with you. 


Polishes used:
Zoya Trixie - 1 coat
China Glaze Glistening Snow - 1 coat
OPI Save Me - 1 coat
OPI Which is Witch - 2 coats
JENsations Holo Daze - 1 coat

I highly recommend you going through your stash and layering your sparkliest polishes! I think next I'm going to try doing this with all blue glitters, purple glitters, etc. What do you think? I absolutely loved the way this came out, even though it about blinds you in the sun! The only downside to this will be trying to get it off, but the good ole foil trick should do the job just fine!

Below, in the top left corner is OPI Save Me. Underneath that is JENsations Holo Daze, followed by China Glaze Glistening Snow. In the top right is Zoya Trixie, followed by OPI Which is Witch?. 


I really hope everyone enjoyed my holo layering! Big thanks to Julie for letting me be here today!

Thanks for reading, 
Emma

_________________________________________________________________________________

Holy wow, Emma!  Thanks so much for sharing this gorgeous mani with us!  This is, indeed, the sparkliest mani I think I've ever seen.  All she needed was a little Lynn Shapeshifter in there and she would've been way over the top!  If you aren't yet, you should definitely be following Emma over at Nailbed Dreams!

Guest Post: Southern Sparkle Nail Art and Jindie Olive You!

Hello Lacquer Lovers!
I'm Samantha and my blog is Southern Sparkle Nail Art! I'm guest posting for Julie, along with a bunch of lovely ladies, while she is away. Today I will be reviewing a Jindie Nails polish that is very close to my heart because I got to name it, Olive You!


As described by Jindie Nails "Olive You is a gorgeous sage/olive green linear holographic polish with metallic green/gold shifting glitters.  It has 3 different types of linear holographic pigments, including SpectraFlair.  This polish is opaque in about 2 or 3 coats." 


I have to agree! Olive You is everything you could hope for in a sage holo! It is opaque in 2 coats and it had a great dry time!


 These photos were taken in natural sunlight! It was a little bit overcast, so the holo is not as strong. :(


Overall, I loved this polish! I would definitely recommend it!


That is it for today, dolls! Come and visit me at my blog, Southern Sparkle Nail Art! I'm doing Halloween posts all month. :)


_________________________________________________________________________________

Wow, that's a beautiful holo right there!  Thank you to Samantha for taking over my blog today!  Make sure to go follow her and check out her amazing Halloween posts!


Guest Post: Lit from Within and Pretty Stripes!

Hello, Fireflies! Oh, wait.  That's my blog.  I'm Nidia, and I'm guest posting, B#$ches! I picked up a couple polishes from this new-to-me Indie, Liquidus.  This is Arsenic, a grey creme with a *very* subtle gold shimmer.  As in, I can't see it on the nail at all.  Very thick formula, could be a one-coater if you were careful.  The ding on my middle finger is actually from my attempt at a teabag patch.  Yeah, it was bad.

Liquidus Arsenic, a grey creme with a *very* subtle gold shimmer

The nail art I did was inspired by this Pinterest pin by Kelsie's Nail Files.  I couldn't find the original blog post - the pin takes you to a collection someone else did of her manis.  I hope someone with better Google-fu than I have can point me to her original post. The first set of stripes I did with a nail art brush and Liquidus Blue Diamond Turquoise.  I love these deep, rich, blue jellies.  I love the depth and shine they have!

The first set of stripes I did with a nail art brush and Liquidus Blue Diamond Turquoise

SpaRitual Ripple Effect is a dusty lilac with enough grey tone to go with Arsenic.  I love these colors together.  I touched up a little bit with Arsenic, too, which is why it's looking a bit of a hot mess.

SpaRitual Ripple Effect is a dusty lilac with enough grey tone to go with Arsenic.

Manis like this *need* topcoat to smooth out all the different textures and make it glossy.

Manis like this *need* topcoat

I can't help but be bummed that I couldn't get that gold shimmer to show up.  I like the combination of colors, though!

I can't help but be bummed that I couldn't get that gold shimmer to show up

Thanks, Julie, for the opportunity to guest post!  If you like this mani, and want to see more from me, please like my Facebook page for blog updates, and/or follow me on my blog.

_________________________________________________________________________________

I always adore Nidia's nail art.  It always looks great, and her instructions are perfect for even the most novice of nail artists (like myself!).  Don't forget to go check her out over at Lit from Within!  Thanks for sharing, Nidia!

Guest Post: Peer Pressure Polish and Elevation Epidote

Hi there fellow lacquer lovers! My name is Jennifer and I run Peer Pressure Polish. I'm just a quick guest post here while Julie is away from her blog. I named my blog Peer Pressure Polish because if I see a polish on someone or on a lot of people I feel compelled to own it. If you tell me I need it, or it's popular I must have it in my life. The polish I am going to share with you today is one of those. This is Elevation Polish Epidote. It is a beautiful Army green holo polish. I first saw this on Instagram from @thepolishaholic. It was so pretty and I had to have it I had no issues with application, this is three thin coats and I was able to wear it about four days. I got so many compliments on this polish. Which was shocking to me, I thought it was going to be a polish only I was going to love. I used a base of Duri Rejuvacote and I used Glisten and Glow HK Girl as my topcoat.


I really wish there had been some sun going on when I had this on, because I couldn't see the full holo effect with the cloudy weather. Thanks for reading my guest post! Jennifer

_______________________________________________________________________________

Wow, that's one Elevation I've been going back and forth on, but I'm seriously wanting it now!  Many thanks to Jennifer for her wonderful guest post!

Comparison Thursday: Guest Post Style - Polish for Reals

Hi guys!  I'm Rachael from Polish For Reals!  I'm so excited that Julie asked me to do a guest post.  I followed her blog long before I actually knew her.  Now I consider her a friend and I'm very lucky to be able to say that.

So what I have for you today is a set of dupes...or not?  You'll find out!  The polishes I have are from Priti NYC and Orly.


Orly Royal Navy retails for around $8.00.  You can find Orly at Sally's Beauty Supply, Ulta, CVS, and many other stores.  It's very easy to find and readily available.  Priti NYC Spring Gentian retails for $13.50.  You can find Priti NYC at some salons and online.


It was hard to get macros of these bottles due to light reflecting.  Below is Spring Gentian.


And here is Royal Navy.  Both polishes are what I would term a bright navy or dark cobalt.  Both also have teal shimmer.


You can see that in the bottle, these polishes already look identical.  The Orly is .6 fl oz while the Priti is only .43 fl oz.


The Orly Brush is a standard polish brush.


Priti has a flat brush that I really love.


You can clearly see the Orly brush is much larger but I think it can be a bit unwieldy.


Below is one coat of each polish.  Spring Gentian is on my index and ring finger.  Royal Navy is on my middle finger and pinkie.


And this is two coats.  Do you see a difference yet?


The teal shimmer is a bit more evident in the Orly than the Priti.


Royal Navy macro.


Spring Gentian macro.


The last photo is where you can see how the Orly has more of a matte finish while the Priti just shines.  I have not used top coat for these photos.


Are they the exact same polish?  Almost.  Do you need both?  No.  Which one is better?  Spring Gentian.  If you haven't tried Priti NYC, don't let the price deter you!  The formula makes them well worth it and they frequently have sales.

Come check me out on my blog, Polish For Reals and enter my giveaway!

_______________________________________________________________________________
If you haven't checked out Rachael's blog yet, you definitely should!  She's got gorgeous nails, and I'm so stoked that she did a Comparison Thursday for us!  I don't have either of those polishes, but now I want both.  Ahhh, c'est la vie, I guess!  ;)

Guest Post: Charlotte my UK Polish Swap Buddy

Hi everyone!
I am Charlie and "met" Julie through the polish community - we arranged an international swap last year then were rudely sabotaged by the UK mail system. Needless to say we seem to have found a workaround that works!

I don't have a blog but am a polish lover. Being in the UK I figured I'd share a UK brand with you.  This brand is not very well known and I have no idea why as they make some fabulous polishes and they are cheap! On average about £1.99 a bottle which considering most polishes here are £5-£10 its a bargain (exception being Barry M who are about £3-4)

So let me introduce you to W7.


I've chosen the sprinkles collection of 3 polishes as it's a small recent collection. But they also do some great glitters and a fantastic "Metallic Planets" collection which has some lovely duochromes.

All seemed to be pretty opaque at 2 coats but I used 3 just to be certain. They all have a lovely formula not too watery but not thick either and the glitter applied evenly as well as having plenty on the brush.


First up is Salt n Pepper. This is small pieces of black micro glitter in a white base and the name is very apt. I'm not sure if it's matt glitter or if the white base makes it seem so but the black glitter is not sparkly even with top coat.


Next up is Mosaic
This is a blue base with pastel coloured lavender and pink glitter as well as and gold. It's pretty much a dupe for the much more costly (£11 per bottle) Nails Inc sprinkle polish Pudding Way. Again these are Matt glitters.


Finally I have Lava Flow.
This is very similar to the salt n pepper polish with the same white base and black matt glitter with the addition of red sparkly glitter. I've used this in a Halloween themed mani as when I swatched it I felt it was quite easily turned into a blood/gore mani as the base was already there.


I hope you enjoyed my guest post. Till then greetings form across the pond :) XO
Charlie

Yaaaay!  Thanks so much, Charlie for helping me out today!  :D  Much love to my swap buddy!!